


52 EN
MasterPage: Heading0_Left
REFERENCES
Power
No power is supplied.
● The power is not connected properly.
HConnect the AC adapter securely. (੬ pg. 14)
● The battery pack is not attached firmly.
HDetach the battery pack once again and re-attach
it firmly. (੬ pg. 14)
● The battery is dead.
HReplace the dead battery with a fully charged
one. (੬ pg. 14)
No display appears.
● When using the AC adapter, the camera enters
the sleep mode, the access lamp lights, and the
LCD monitor turns off.
HTo cancel the sleep mode, perform any operation
such as zooming.
The power was turned off accidentally.
● The drop detection function operated. (੬ pg. 21)
HSet the power switch to OFF, and turn the power
on again. To turn off the drop detection function,
set [DROP DETECTION] to [OFF]. (੬ pg. 49)
Recording
Recording cannot be performed.
● [MEMORY CARD IS FULL] appears.
HReplace with new recording medium or delete
unnecessary files. (੬ pg. 20, 39)
● Recording medium is not selected properly.
HSelect the recording medium. (੬ pg. 21, 48, 49)
When shooting a subject illuminated by
bright light, vertical lines appear.
● This is not a malfunction.
When the screen is under direct sunlight
during shooting, the screen becomes red or
black for an instant.
● This is not a malfunction.
During recording, the date/time does not
appear.
● [DATE/TIME] is set to [OFF].
HSet [DATE/TIME] to [ON]. (੬ pg. 49)
The LCD monitor indications blink.
● Certain modes of program AE, effect, DIS and
other functions that cannot be used together are
selected at the same time.
Digital zoom does not work.
● [ZOOM] is set to [15X]* (optical zoom).
HSet [ZOOM] to [60X] or [700X]*. (੬ pg. 50)
● Digital zoom is not available in the still image
recording mode.
* For GZ-MG30U/GZ-MG20U optical zoom can go
up to 25x, and [ZOOM] can be set to [100X] or
[800X].
Troubleshooting
The camera is a microcomputer-controlled
device. External noise and interference (from a
TV, a radio, etc.) might prevent it from
functioning properly.
HTo solve the problem, follow the Instructions
below at first.
HIf the problem is not solved, reset the
camera. (Refer to “To reset the camera”
below.)
HIf the problem still exists, please consult your
nearest JVC dealer.
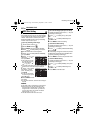
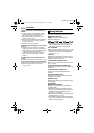
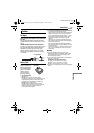
8 To reset the camera
A Press RESET using a piece of wire or other
such pointed instrument. The power is
turned off once and turned on again
automatically.
B If nothing happens, set the power switch to
OFF and remove the power supply (battery
pack or AC adapter) from the camera, then
put it back again.
C Execute [PRESET] from the menu. The
camera returns to it’s factory-preset.
(
੬ pg. 48)
RESET
M5E3US.book Page 52 Wednesday, September 7, 2005 4:38 PM