Digital Photo Frame V10M10_IM_EN_12192007
www.jWIN.com
- 9 -
GETTING STARTED
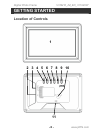
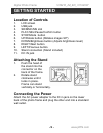
Location of Controls
1. LCD screen
2. USB jack
3. SD/MMC/MS slot
4. PLAY/SEL/Pause/Confirm button
5. STOP/Mode button
6. UP/Rotate button (Rotates images 90º)
7. DOWN/Brightness button (Adjusts brightness level)
8. RIGHT/Next button
9. LEFT/Previous button
10. Stand connection (Stand included)
11. DC IN jack
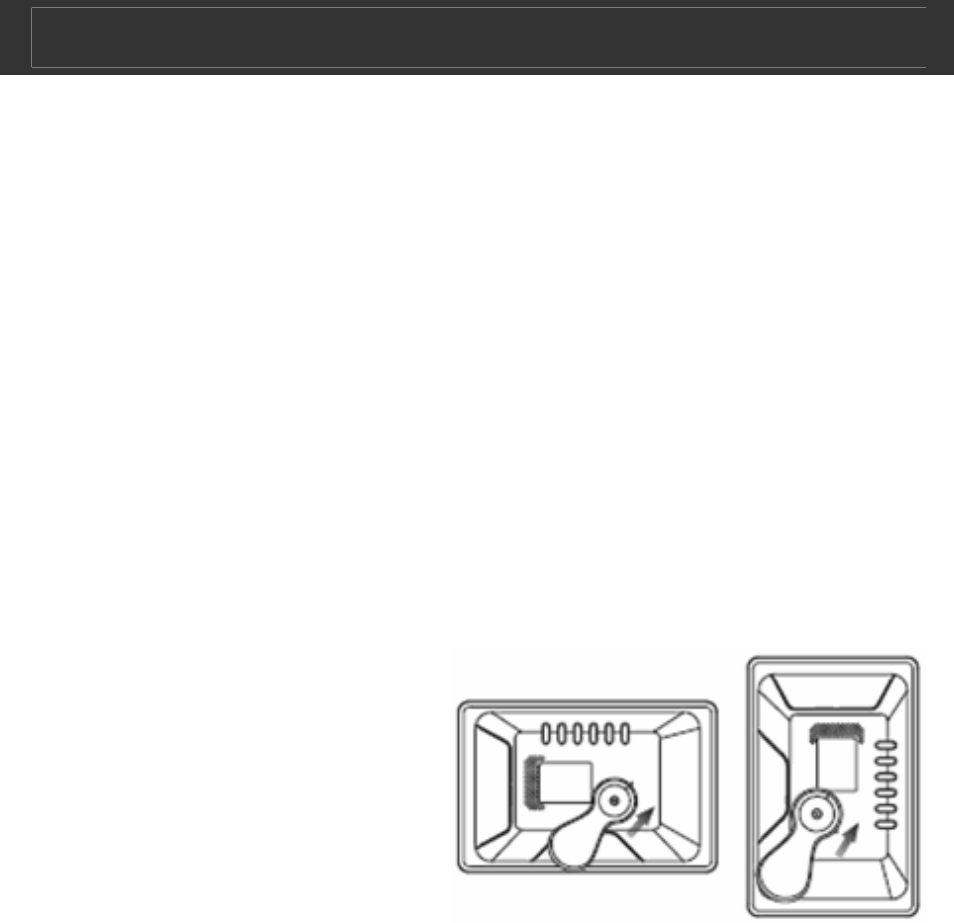
Attaching the Stand
1. Push the head of
the stand into the
connector on the
back of the frame.
2. Rotate stand
clockwise until it
locks in place.
Frame can stand
vertically or horizontally.
Connecting the Power
Attach the AC power adapter to the DC in jack on the lower
back of the photo frame and plug the other end into a standard
wall outlet.


