


Page - 16
TAKING THE PHOTOS (CONTINUED).
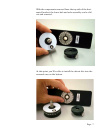
You can use the level on your KiWi™ and observe it while you
level the tripod. Of course, this task is much easier if your tri-
pod also has a tilt head.
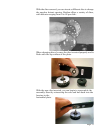
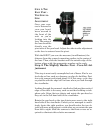
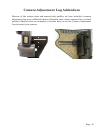
Once the tripod and KiWi™ are level, now is the time to double
check to see if the camera is straight up and down. If it needs
to be adjusted, loosen the Captive knob just a slight amount
and tilt the camera accordingly. Be sure not to change the Fore-
Aft dimension. Tighten the Captive knob.
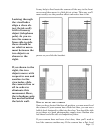
If your using the KiWi-L rotate the camera so that the groove
on the Horizontal Bracket aligns with the zero point on the
circular barrel. Depending on whether the stitching software
that you’re using prefers the having the photos taken in a clock-
wise or counterclockwise sequence, you’ll have to either count
down from 360 degrees or count-up from zero degrees.
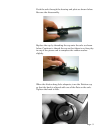
NOTE: Starting with KiWi™-L units produced after July 1,
1997, we have added a bonus Label Sheet. This set contains
self-adhesive labels with the popular degree increments. Since
there are no other markings, the labels make it easy to rotate
and stop at the correct position for your particular camera and
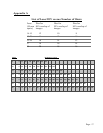
lens combination.There is a “List of Lens FOV versus Number
of Shots” chart and a “Degrees of Angle” chart in Appendix A.
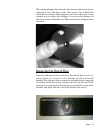
As you shoot around the circle, try to avoid capturing any mov-
ing objects that might come into your field of view. There is no
harm in waiting, for example, while a person walks past before
shooting the photo.
You may also want to check with the software developer of the
stitching software that you’re using to get their recommenda-
tions for exposure settings and other camera settings.
We hope you enjoy shooting your panoramas and if you have
any questions or problems using our equipment, please let us
know. We would also like to see the results of your work and
would be glad to consider placing your work on our website, or
to put a link to your website as well.
Thank you,
The Kaidan team.