


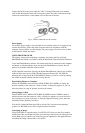

CAMERA OPTIONS
To select any camera option press the MODE button on the back of the camera. The
icon flashes when selected. Press the SELECT button to advance through the options
until the desired function is chosen.
Fig. 3. Illustration of camera mode options.
Auto Focus
The Auto Focus (AF) function allows you to select from three focus settings: Multi-spot
auto focus ( three dots under the AF icon), single spot auto focus (one dot under the AF
icon), and close-up focus (a flower icon). Use the MODE button to select the desired
Auto Focus icon. Once the camera is turned off, the default settings are automatically
reset the next time the camera is turned on.
Exposure Compensation
The exposure compensation icon (left and right arrow with positive sign on right and
negative sign on left) allows you to change the exposure to adjust the camera for too dim
or too bright lighting. The exposure value can be measured to plus or minus two steps
(equivalent to aperture settings) from the automatically measured setting.
Flash
The Flash Icon allows you to select from three flash settings: automatic flash (zig-zag
down arrow with an A), flash off (Zig-Zag down arrow in a circle), and flash on (Zig-
zag down arrow). Automatic flash determines if the flash should be used depending on
the existing light. Flash on uses the flash regardless of existing light. Flash off uses no
flash.
Image Quality
The image quality icon allows you to select from three image quality settings: good,
better, and best. The actual resolution does not change (it is 144 dots per inch). The
lower quality creates a smaller image. Good is selecting the single dark square under the
word "Quality" on the LCD screen. Better is a medium quality and is selected by
choosing two dark squares. Best is a high quality and is selected by three dark squares.
Note that since the camera has a limited amount of memory, selecting higher quality
(thus stored as a larger image) images results in fewer pictures.
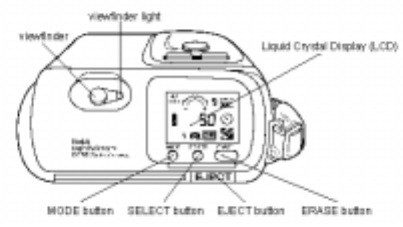
Images Remaining Counter
The Images remaining counter appears near the center of the LCD. The number is the
approximate number of pictures that can be taken. This number varies depending on the
image quality chosen. When the counter hits 0 no more pictures can be taken. The
images must either be transferred to the computer or erased, in which case they are non-
retrievable.
CONNECTING TO COMPUTER
When through taking pictures with the DC50 camera, the images are transfered from
the camera to a computer. The pictures are normally transfered, converted to an
applicable format, and stored on disk.