5
English
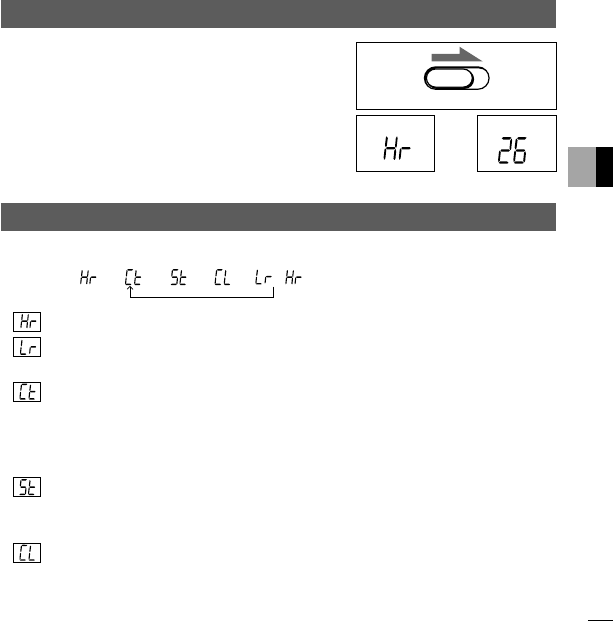
4. Taking Pictures
1 Set the main switch on the side of the camera to ON (REC)
(Figure 1).
The status LCD on the back of the camera will display the
mode, which appears initially as “Hr” (Figure 2a). A few
seconds later, the display will change to show the number
of the pictures that can be taken (Figure 2b).
2 Arrange your picture in the viewfinder and press the shut-
ter button.
The camera will take a picture with a beep tone. You can
continue taking pictures until the status LCD shows “00.”
5. Selecting Modes
Use the mode switch on the side of the camera to select the required shooting mode or operation.
As you press the mode switch, the camera cycles through the following setting:
////
/
● Normal shooting mode
High-resolution mode VGA (640 x 480 pixels) 26 images
Low-resolution mode QVGA (320 x 240 pixels) 99 images
Modes can be changed by pressing the shutter button while “Hr” or “Lr” is displayed.
● Continuous shooting mode (movie)
Lets you take pictures continuously to play as movies using AVI Creator in Windows or
QuickTimePlayer in Macintosh.
After selecting a normal shooting mode, press the mode switch once to see “Ct” on the
status LCD. While “Ct” is displayed, hold the shutter button down to take continuous
pictures. (For instructions on how to play movies, see page 11.)
● Self-timer mode
Takes a picture after a delay of approximately 10 seconds.
After selecting a normal shooting mode, press the mode switch twice to see “St” on the
status LCD. Press the shutter button while “St” is displayed to start the delay timer.
● Clear mode
Clears all recorded image files.
After selecting a normal shooting mode, press the mode switch three times to see “CL” on
the status LCD. Press the shutter button while “CL” is displayed, and the status LCD will
begin blinking. Press the shutter button once again while the status LCD is blinking to
clear all recorded image files.
(Figure 1)
(Figure 2a)
(Figure 2b)
(
ERASE
)
OFF ON
(
REC
)


