


- 14 -
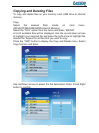
Press Enter to start copying the file.
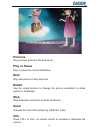
Delete
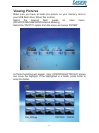
Select the desired flash media on main menu.
(SD/xD/CF/MS/USB/NAND-Internal Memory)
Select the “FILE” option from the menu and press “ENTER”
A list of available files will be displayed. Use the up and down arrows
to highlight your required file and press the right arrow to highlight the
desired file. Repeat for all files that you want to copy
Press the “OSD” button to display the Copy and Delete menu. Select
Delete function and press Enter. File will be deleted.
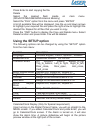
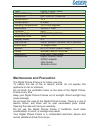
Using the SETUP option
The following options can be changed by using the “SETUP” option
from the main menu:
Function Description
Language Includes English, French, Spanish , Russian
Slideshow time Slideshow duration: 5s/10s/30s
Transition Effect Off, Random, Fading, Bottom_to_top
Top_to_bottom, Left_to right, Right_to_left,
Door_close, Door_open, Hori_cross,
Verti_cross
Music Repeat Mode Repeat one, Repeat all, Repeat off
brightness Range of the brightness scale is 0-16
Contrast Range of the contrast scale is 0-16
Saturation Range of the saturation scale is 0-16
Movie Repeat
Mode
Repeat one, Repeat all, Repeat off
Display mode Crop, Stretch, Cinema
Time Year/Month/Date/Time setup
Alarm Alarm Time/Alarm Music/Alarm On/off setup
Default Recover the factory default setup
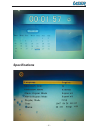
Calendar/Clock Display (Only for Special requirement)
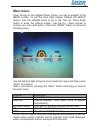
Upon turning on the Digital Picture Frame, you will go straight to the
MENU screen. If you select Calendar/Clock and press Enter, you will
go to Calendar/Clock screen. If the Alarm is turned on, it will also
show the alarm time. A picture slideshow will begin at the picture
preview window at the right part of the screen.