


- 3 -
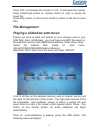
Installing your unit
Open the package and remove the protective foam. Remove the
protective sleeve from the unit.
Install the Digital Picture Frame stand as the back of the unit.
Plug in the AC adapter into power outlet. Plug the other end into the
unit.
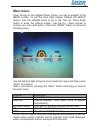
After the content is stored on the target flash media; insert the media
into the correct slot.
Turn power to ON position via the ON/OFF switch.
Connecting to a PC
The Digital Picture Frame has a USB port for connection to a PC
(USB Slave) and a second USB port for connection to other devices
such as a Flash Drive, USB card reader, or a camera (USB Host).
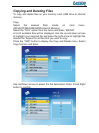
When connected to the PC you can drag-and-drop content from the
PC to the internal memory or memory card. You can also delete
content from the internal memory.
NOTE: USB Slave and USB Host can not be used at the same time.
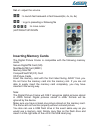
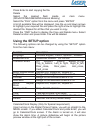
Using your Remote Control
The following table briefly describes the remote control functions
power : Power On/Off.
mute
:
Mute
setup : Enter the basic setup function of player.
Backmusic : In media menu, select JPEG file with «UP/DOWN» button,
press «SLIDESHOW» button to launch automatic slideshow with background
music. The first MP3 file on memory card is launched.
photo : enter the photo play mode directly and launch automatic
slideshow.
music : enter the music play mode directly and launch the first MP3 file
saved on the memory card.
movie : enter the video play mode directly and launch the first video file
saved on the memory card.
enter : confirm and enter.