


Camera Installation
10
Camera Installation
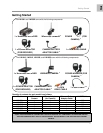
Before you install the camera(s), carefully plan where and how it will be positioned, and where you will
route the cable that connects the camera to the power adaptor or battery adaptor.
Installation Warnings:
• Aim the Cameras to best optimize the viewing area: Select a location for the camera that provides
a clear view of the area you want to monitor, which is free from dust, and is not in line-of-sight to
a strong light source or direct sunlight.
• Avoid installing the cameras where there are thick walls, obstructions, or interference (i.e.
cement, concrete, metal, transformers, or other electrical equipment) between the Cameras and
the Receiver. This will reduce the transmission range.
• Select a location for the camera that has an ambient temperature between 14°F~113°F
(-10°C~45°C)
• Before starting permanent installation, have another person hold the camera for you while you
verify its performance by observing the image on a monitor.
• Audio feedback may occur when the receiver and camera(s) are too close (under 10 feet /3
meters.
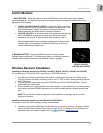
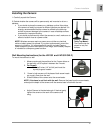
Night Vision
This camera includes IR LEDs, which provide the camera with the ability to view images in low light
conditions. It is important to use the provided power adaptor (not the 9V DC Battery Adaptor) when using
the camera for prolonged periods in low light conditions, as the LEDs will drain the battery more quickly
than regular daytime use.
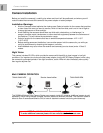
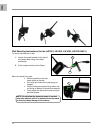
Multi CAMERA OPERATION
This 900MHz Wireless Color Camera System can support a total of 2 cameras (additional camera is sold
separately). When using multiple cameras, set each camera to different channels. The Receiver needs to
be set to have 2 cameras switched to ON, to have all attached cameras functioning simultaneously.
NOTE: The LW1001, LW1010, and LW1020 are expandable.
To order additional cameras please visit our website at www.lorexcctv.com