


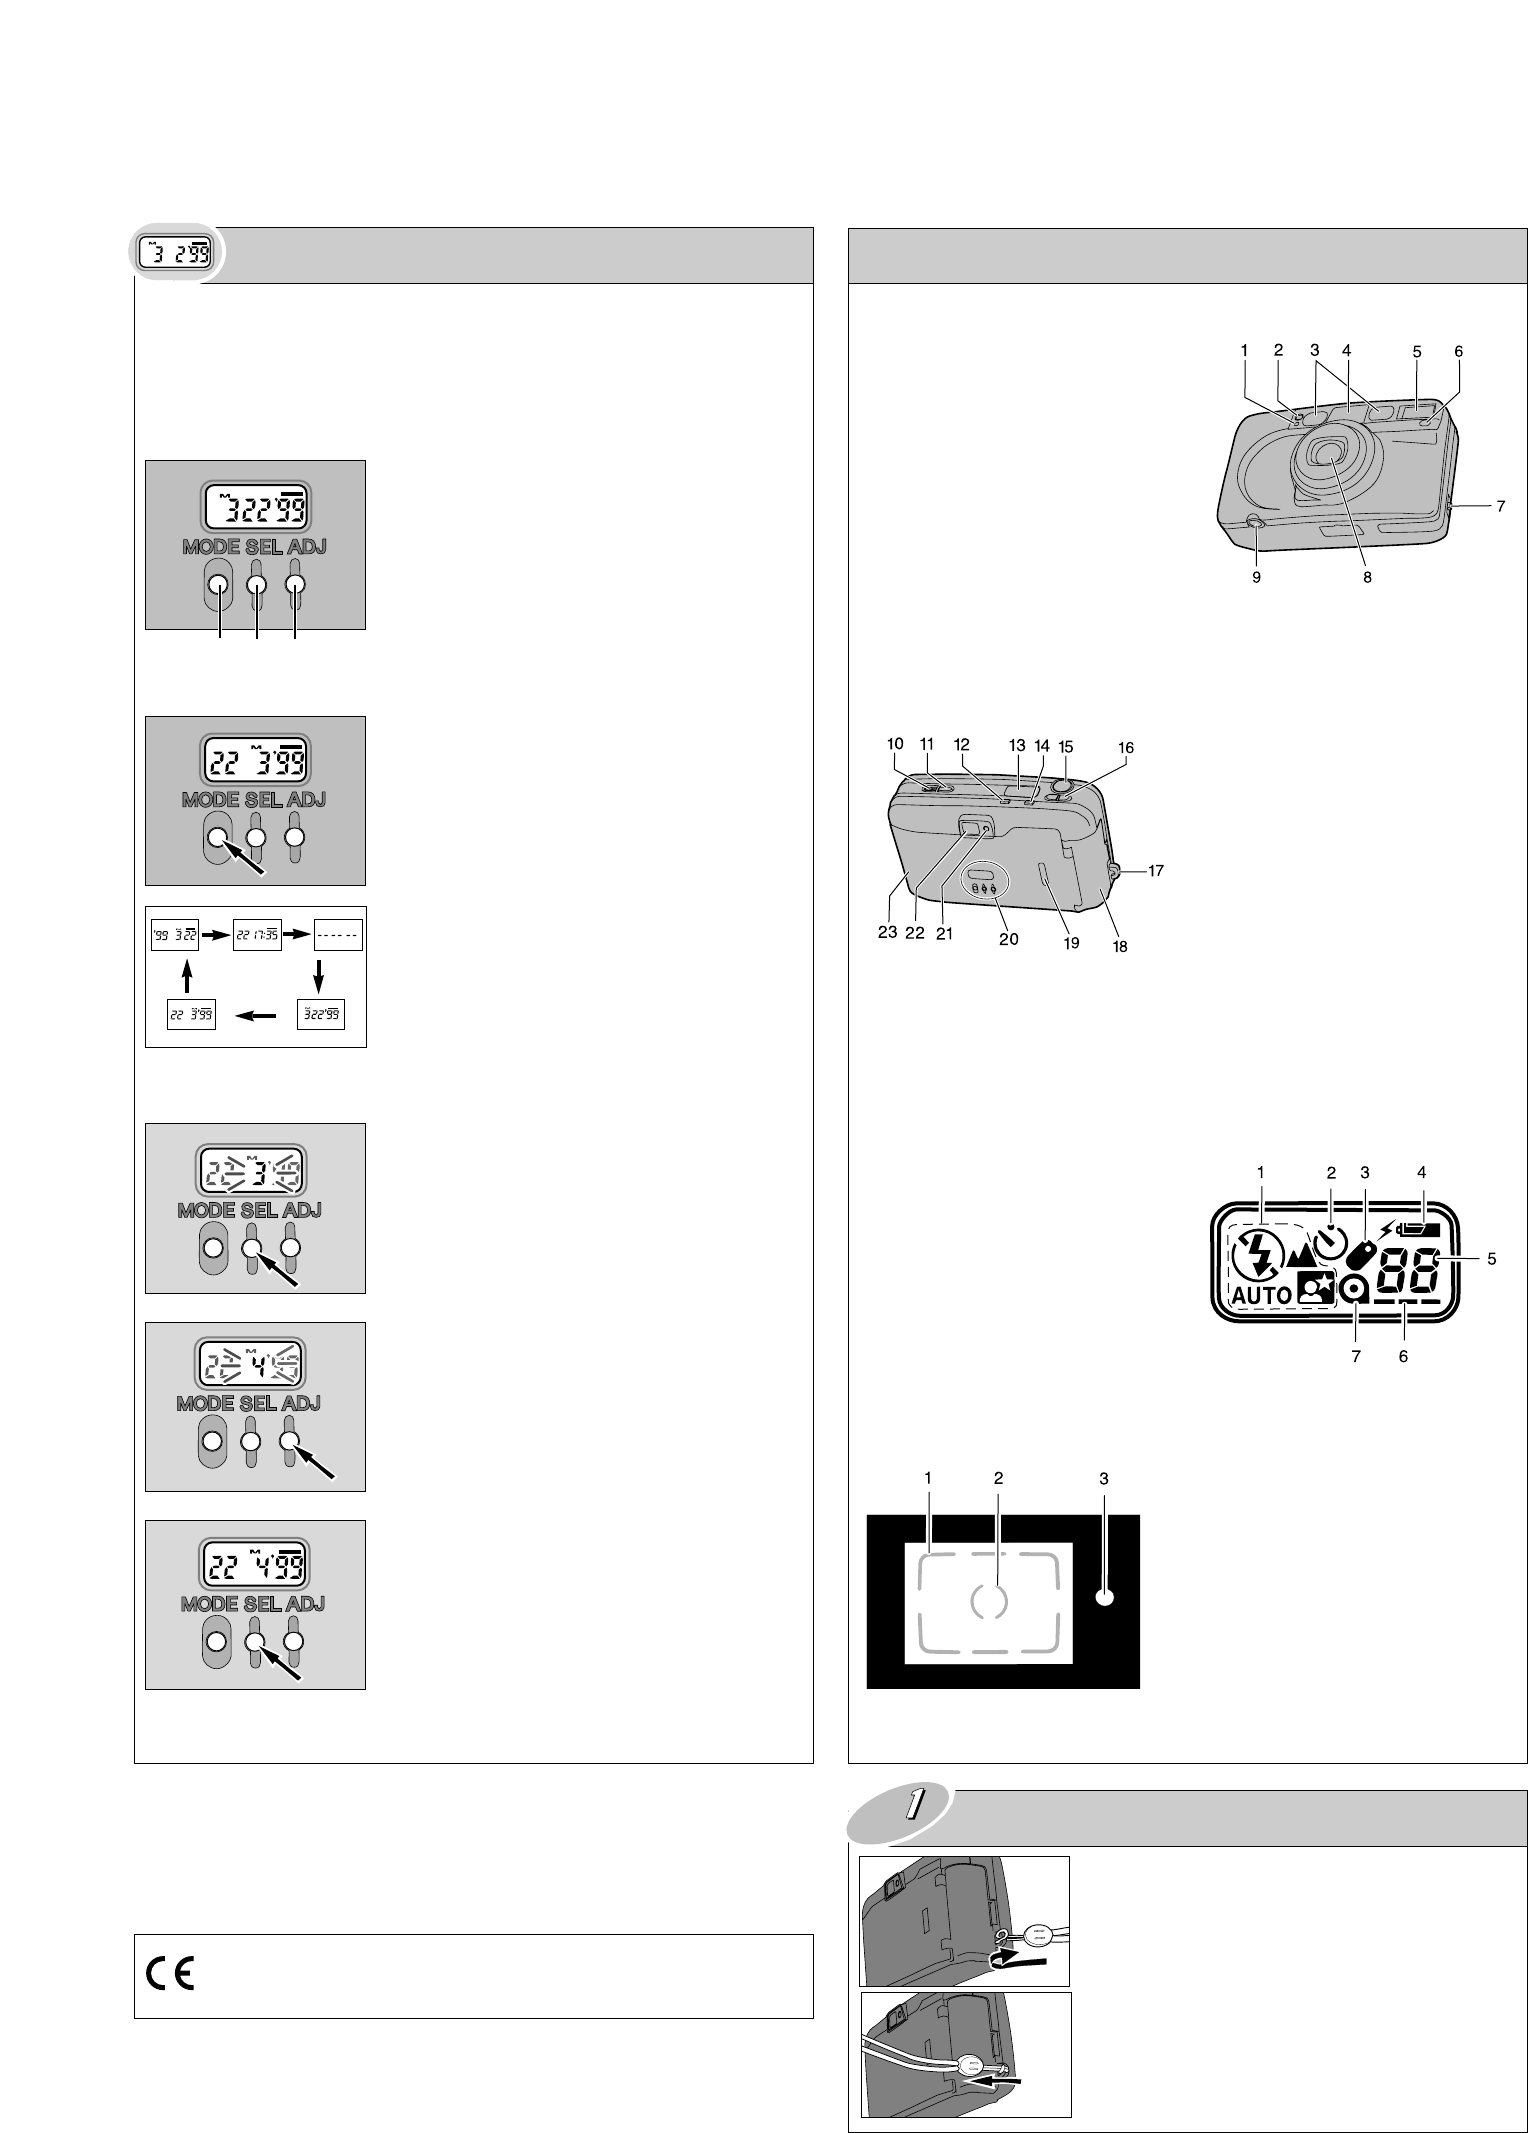
NAMES OF PARTS
FRONT
1.Self-timer/Remote-control**/Red-eye
reduction lamp
2.Meter window*
3.AF windows*
4.Viewfinder window*
5.Flash*
6.Remote-control receiver*/**
7.Back-cover release
8.Lens*
9.Tripod socket
10. Manual-rewind button
11. Main switch
12. Flash-mode button
13. Data panel
14. Self-timer/remote-control** button
15. Shutter-release button
16. Zoom lever
17. Strap eyelet
18. Battery-chamber door
19. Film window
20. Date buttons (DATE model only)
21. Flash lamp (green)
22. Viewfinder*
23. Back cover
BACK
DATA PANEL
1. Flash-mode indicators
2. Self-timer indicator
3. Remote-control indicator**
4. Battery-condition indicator
5. Frame counter
6. Film-transport signals
7. Cartridge mark
1. Image frame
2. Focus frame
3. Flash lamp (green)
Glows: Flash is ready
Blinks: Flash charging
VIEWFINDER
** Remote-control models only.
* Do not touch.
This mark on your camera certifies that this camera meets the requirements of the
EU (European Union) concerning interference causing equipment regulations. CE
stands for Conformité Européenne (European Conformity).
This feature lets you to record the date or time onto the lower-right
portion of the picture. It has an automatic calendar through the year
2049.
• Imprinted data may be difficult to read if the area over which it is superimposed is bright
or non-uniform.
• Do not use the data back when temperatures exceed the operating range of 0° to 40°C
(32° to 104°F).
1. MODE button
2. SELECT button
3. ADJUST button
1 Press the MODE button to choose the data
imprinting format.
• The display will change as shown.
• When -- -- -- is displayed in the data panel, no data will
be printed on the print.
1 Use the SELECT button to move between
different parts of the displayed data. The
selected part will blink indicating that it is
the data to be changed.
2 Press the ADJUST button to change the
data to the correct value. Data continues
changing as long as you hold down the
button.
• In Time mode, pressing the ADJUST button while the
colon is blinking resets the second counter to 00.
3 When all data is correct, press the SELECT
button until the data stops blinking.
• Reset the time and date after changing the battery.
IMPRINTING THE DATE AND TIME
1
2
3
FOR OWNERS OF THE DATE MODEL
Step
Attach the strap as shown.
ATTACHING THE STRAP
SETTING THE TIME AND DATE