61
Using ViewNX 2
Copy Pictures to the Computer
Before proceeding, be sure you have installed the software on the supplied ViewNX 2
CD (0 59).
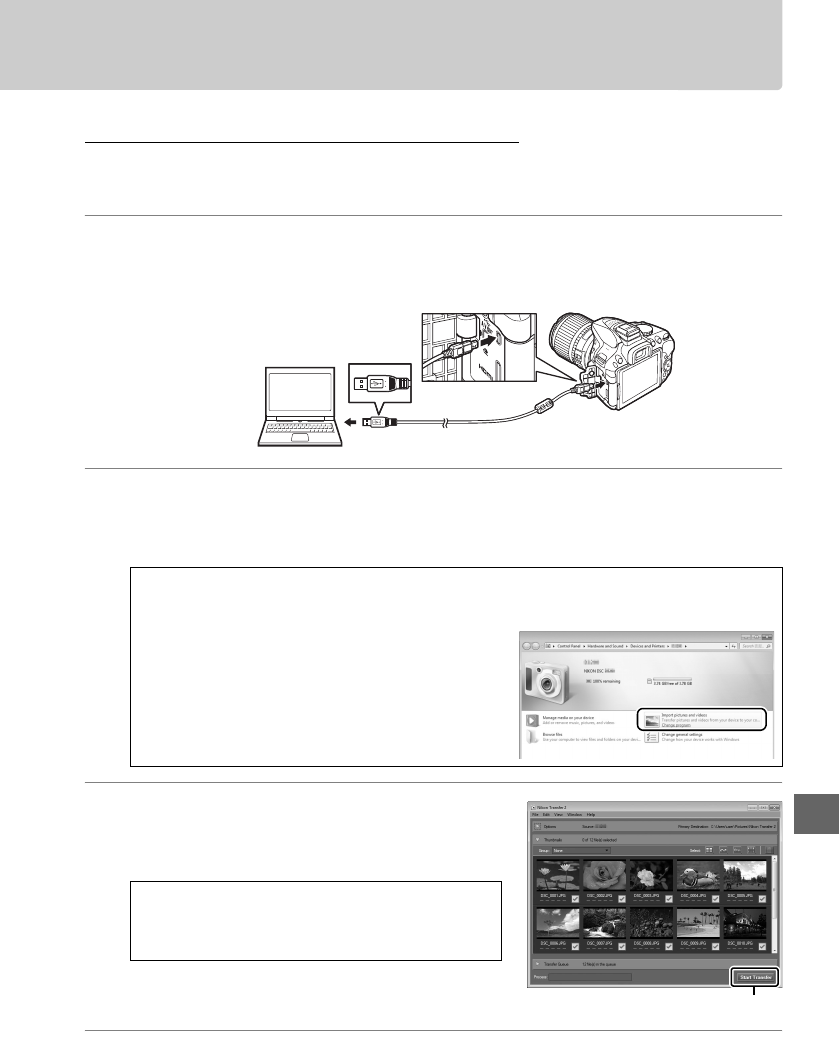
1 Connect the USB cable.
After turning the camera off and ensuring that a memory card is inserted,
connect the supplied USB cable as shown and then turn the camera on.
2 Start Nikon Transfer 2 component of ViewNX 2.
If a message is displayed prompting you to choose a program, select
Nikon Transfer 2.
3 Click Start Transfer.
At default settings, pictures on the memory
card will be copied to the computer.
4 Terminate the connection.
When transfer is complete, turn the camera off and disconnect the USB cable.
A Windows 7
If the following dialog is displayed, select Nikon Transfer 2 as described below.
1 Under Import pictures and videos, click
Change program.
A program selection dialog
will be displayed; select Import File using
Nikon Transfer 2 and click OK.
2 Double-click Import File.
A During Transfer
Do not turn the camera off or disconnect the
USB cable while transfer is in progress.
Start Transfer


