


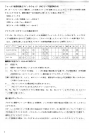
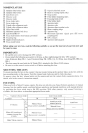
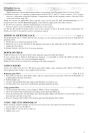
•HHHHHHBHHHI
©= Excellent focusing
0= Acceptable focusing
Slight vignetting or moire phenomenon affects screen image, but film image shows no traces of this.
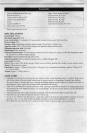
(
)=
Indicates degrees of exposure compensation needed for F4- and F2- series cameras. For F4-series
cameras, compensate using the Exposure Compensation Dial for the focusing screens. (See the F4/F4s
instruction manual, page 78.)
Blank box means not applicable. Since type M screen can be used for both macrophotography at a 1:1
magnification ratio and for photomicrography, it has different applications than other screens.
% For F3-series cameras, exposure compensation is not necessary.
* Screens T and U are not available for use with F2-series cameras.
For the K2, B2 and E2 focusing screens, refer to the columns on the K, B and E screens, respectively. For
details, also refer to the specific camera's instruction manual.
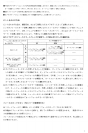
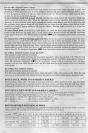
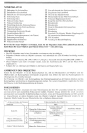
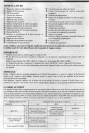
MINIMUM APERTURE LOCK Illust.
A
For programmed auto or shutter-priority auto shooting, use the minimum aperture lock lever to lock the lens
aperture at f/22.
1.
Set the lens to its minimum aperture (f/22).
2.
Slide lock lever in the direction of the aperture ring and so the white dot on the lever aligns with the
orange dot. (See illust.)
To release the lock, slide the lever in reverse direction.
DEPTH OF FIELD
Depth of field can be checked with the white indicator engraved on the lens barrel.
If your camera has a depth-of-field preview function, it is possible to check the depth of field in the
viewfinder. (For details, see camera instruction manual.)
Depth of field can also be checked by referring to the table on page 34.
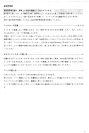
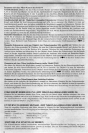
USING FILTERS
Always use
a
filter with the lens. The slip-in glass filter holder comes mounted with a Nikon L37C filter. A
slip-in gelatine filter holder is also supplied with the lens.
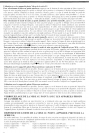
Replacing glass filters Illust. B, C. D
1.
Press down on the glass filter holder knob, and turn counterclockwise until the white line on the knob is at
a right angle to the axis of the lens.
2.
Pull the holder out.
3.
Unscrew the mounted filter and replace with the filter you want to use.
4.
Put the holder back, push down on the knob, and turn clockwise to lock.
Using gelatine filter Illust. E
1.
Cut the gelatine filter into a circle of approx. 40mm {1.6 in.) in diameter.
2.
Open the gelatine filter holder plate by pushing on the latch and lifting up.
3.
Insert the gelatine filter into the holder and close the plate. Make sure the filter is unscratched and free of
dust and take care that it stays flat.
4.
Remove the glass filter holder from the lens and insert the gelatine filter holder.
USING THE LENS HOOD HK-19
When shooting in bright sunlight, use the lens hood to prevent stray light from entering your lens.
1.
Loosen lock screw on the HK-19.
2.
Slip the HK-19 onto the front of the lens.
3.
Tighten lock screw.
15