


Nikon D70/D70s User’s Guide
CONTROLS (I explain every button and knob)
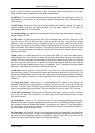
CONTROLS: FRONT of CAMERA
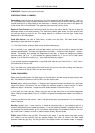
Focus Mode (the little lever at the bottom of the lens marked AF and M [hidden above]): I set it to
AF. This means Auto Focus. M means manual focus. In manual focus you have to twist the focus ring
yourself and look for a sharp image in the viewfinder. In manual you also can look for the green dot
at the bottom left in the viewfinder. The green dot lights up when you're in focus.
Depth-of-Field Preview (the little button below the lens in the photo above): Tap this to stop the
diaphragm down to the taking aperture. The viewfinder probably gets darker, but look carefully and
you can see what's in focus or not. This analog feature is a remnant from film days. Today most
people look at the LCD playback.
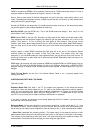
Flash Bolt Button (left side of flash hump, as seen from the rear): This does several things
depending on how and when you press it.
1.) If the flash is down, press the flash button and the flash pops up.
2a.) If the flash is up, press and hold the flash button and turn the front dial to change the flash
exposure compensation. This sets the brightness of the flash. + makes the flash brighter, - makes it
dimmer. This setting only changes the brightness of the flash. It leaves the background ambient
exposure alone. Set it to - if your subjects are getting washed out. If you run out of flash power
beyond 10 to 20 feet then setting it to + can't make the flash any brighter.
If you set flash exposure compensation to anything other than zero you'll see a little "+/- bolt" icon in
the finder and on the top LCD.
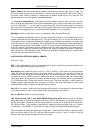
2b.) If the flash is up, press and hold the flash button and turn the rear dial to change the flash sync
mode. You'll see it on the top LCD in the box with the bolt.
FLASH SYNC MODES
Select these by holding down the flash button on the left side of the flash hump and spinning the rear
dial. Your selection is shown on the top LCD in the box with the bolt.
Normal (blank, which is the default): In Program and A exposure modes, the shutter won't stay open
longer than about 1/60 second. You can change this minimum speed in custom function 21, which
defaults at about 1/60 second. I forget the exact default because I have mine set to 1/15.
In this mode you won't get blur indoors, but you may not get more than a very black background
either. Choose a longer speed, like 1/8, in CSM 21 to lighten the backgrounds indoors, but watch for
motion.
I usually use Normal mode, since if I don't I can get some scary long exposures if I'm not expecting
them in the dark.
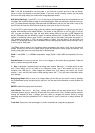
Red-Eye (eyeball icon): I never use this. It shines an obnoxious light in your subject's eyes for a
couple of seconds and then releases the shutter. If I set this mode by accident it bugs the heck out of
me, because the camera doesn't go off until several seconds after I've pressed the shutter, but I've
set no self timer! It doesn't do much to reduce redeye anyway. Skip this mode.
SLOW (called SLOW on the top LCD): This mode is very useful. It lets the shutter stay open as long
as it needs to so dim ambient light can expose properly with flash. Of course if it's dark these
exposure times can get long. You can get blur from subject motion and camera shake. In daylight
© Ken Rockwell 5 of 5