


155
Editing Pictures
Editing Pictures
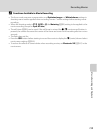
j Black Border: Adding a Black Border to Pictures
This function creates black borders along the border of a picture. Choose from
Thin, Medium or Broad lines. The created pictures are stored as separate files.
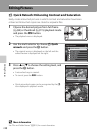
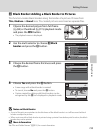
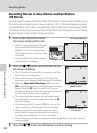
1
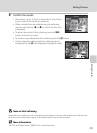
Choose the desired picture from full-frame
(A34) or thumbnail (A115) playback mode
and press the d button.
• The playback menu is displayed.
2
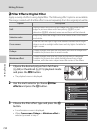
Use the multi selector to choose j Black
border and press the k button.
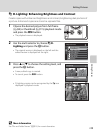
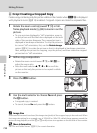
3
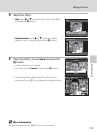
Choose the desired frame thickness and press
the k button.
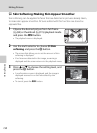
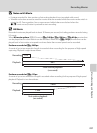
4
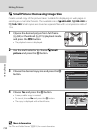
Choose Ye s and press the k button.
• A new copy with a black border is created.
• To cancel, choose No and press the k button.
• Copies created by editing with black borders can be
recognized by the J icon displayed in playback mode.
B Notes on Black Border
• A part of the picture equivalent to the thickness of the black border is cut off because the black
border overlaps the picture.
• When a picture with a black border is printed using a printer’s borderless print function, the black
border may not be printed.
D More Information
See “File and Folder Names” (A215) for more information.
Playback menu
Rotate image
Hide image
Small picture
Voice memo
Copy
Black border
Sequence display options
Black border
Thin
Medium
Broad
Create a copy with a
black border?
Yes
No