


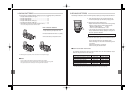


Various Flash Shooting Methods
The following flash shooting methods are possible according to the camera setup.
•Some flash shooting methods may be unavailable depending on the function and design of the
camera.
•For details on operating procedure, refer to the instruction manual for your camera.
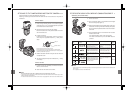
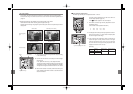
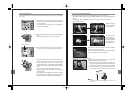
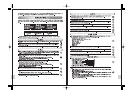
1. Red eye-reduction flash
Reduces the appear-
ance of red eyes due
to flash emission.
2. Slow sync
The flash is emitted
with slow shutter.
This makes it possible
to take clear pictures
of subjects against a
night background.
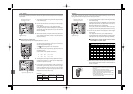
3. Background screen sync
Slow shutter is used and the flash is emitted immediately
before the end of exposure period.
This makes it possible to take pictures of moving objects
such as car taillights with a streaming effect.
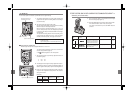
4. Combination with camera’s built-in flash
When the camera in use has a built-in flash, it can be used
simultaneously with the electronic flash.
• Advanced shooting techniques are possible. For example, you
can bounce the light from the electronic flash off the wall or ceil-
ing while using the camera’s built-in flash for a catch-light effect.
•With certain camera models, the built-in flash may be disabled
when the electronic flash is mounted on the camera’s hot shoe.
■Note
The electronic flash control mode should be set to TTL AUTO or FP
TTL AUTO.
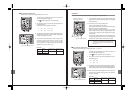
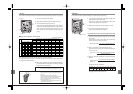
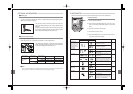
Using the Wide Panel
Use the built-in wide panel in flash shooting when the lens focal length is set to a wider position
than 12 mm.
1. When the lens focal length is shorter than 12 mm (24 mm
with the 135 type), the wide panel warming indicator lights
in the control panel.
(This does not occur if the camera is not equipped with
communication capability.)
2. Slide out the wide panel and place it on the light-emitting
area.
•The wide panel indicator lights in the control panel.
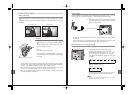
3. Press the ZOOM button to select the firing angle from 8
mm and 10 mm (16 mm and 20 mm with the 135 type).
Wide panel indicator
•When the wide panel is used, the actual guide number
(GN) will be lower than set. In the TTL AUTO, AUTO and
FP TTL AUTO modes, this results in a reduction of the
available shooting range. In the MANUAL and FP MANUAL
modes, this results in a reduction of the optimum shooting
range.
•Be sure to store the wide panel again after shooting.
•To prevent damage to the wide panel, do not flip it in the
upward direction.
•If the wide panel is damaged when it is slid out, the ZOOM
button will no longer be operable. If that happens, disable
the wide panel switch to restore operability (page 61).