E-20
Installation Removal
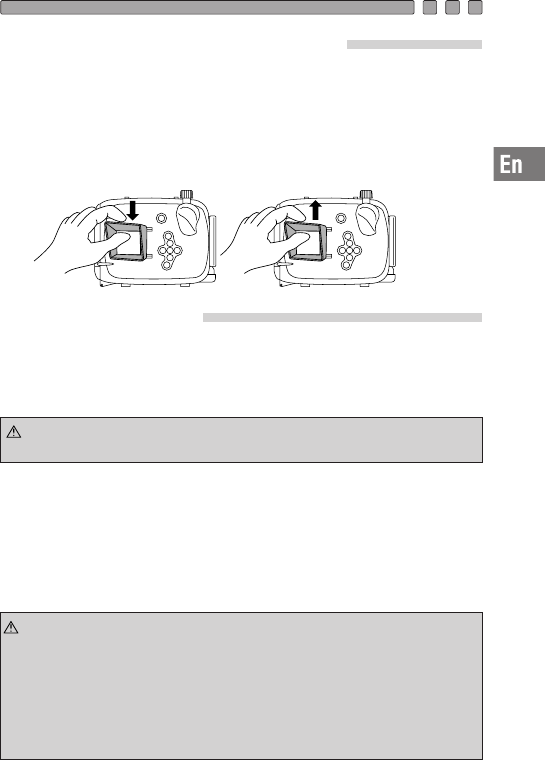
Installation and Removal of the LCD Hood
Installation
Strongly push the mounting projections of the LCD hood as shown in the
figure into the guides above and below the LCD monitor window.
Removal
Remove the mounting projections of the LCD hood from the guides
above and below the LCD monitor window by widening the LCD hood.
: •
After loading the camera into the Case, confirm that the mode
dial moves. If it does not move, there is the possibility that oil or
fat has been attached to the mode dial. Please wipe it clean.
•
When no operation is performed for three minutes after the digital
camera has been loaded (or for the specified time when a different
time has been specified), the camera enters into sleep mode
(standby status) to save battery power. It returns to operation
status when the shutter button or the zoom lever is operated.
CAUTION
Try to move the mode dial.
After sealing, turn the mode dial knob and confirm that the mode dial of the
camera is switched.
Set the power to 'ON'.
Move the power switch lever and confirm that the camera power can be
switched ON and OFF.
Perform the final checks.
Visual Inspection
After sealing the Case, check the sealing part of front and rear lid visually
to confirm that the O-ring is not twisted or out of the groove and that no
foreign matter has been caught.
: •
Hairs, fibers, and other narrow items are not very apparent, but
they may cause entry of water, so that special attention is required.
CAUTION


