48
EN
Using OLYMPUS Master
Macintosh
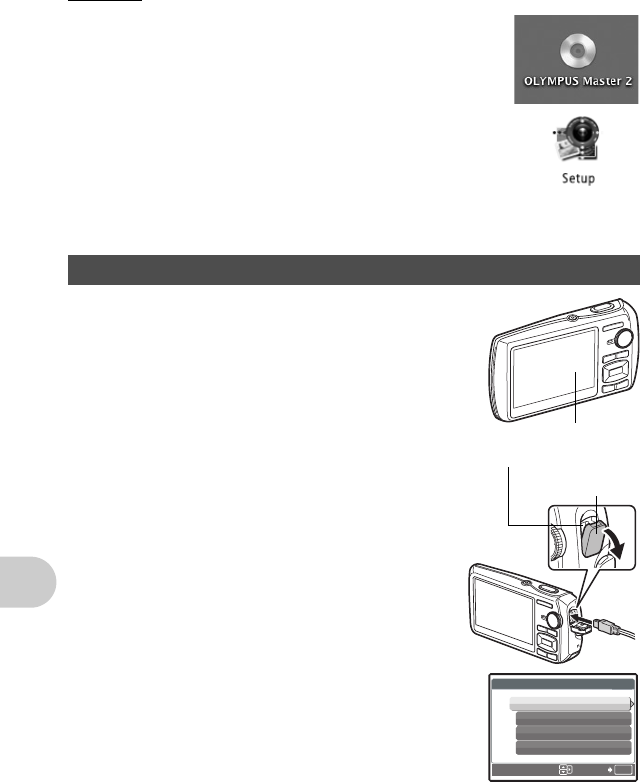
1 Insert the CD-ROM into the CD-ROM drive.
• The CD-ROM window is displayed.
• If the CD-ROM window is not displayed, double-click the CD-ROM
icon on the desktop.
2 Double-click the “Setup” icon on the desktop.
• The OLYMPUS Master installation screen is displayed.
• Follow the on-screen instructions.
• When the OLYMPUS Master licensing agreement is displayed, read
the agreement and click “Continue” and then “Continue” to proceed
with the installation.
• The screen confirming that installation is completed is displayed.
• You must restart your computer before using OLYMPUS Master.
1 Make sure the camera is turned off.
• The monitor is off.
• The lens is retracted.
2 Connect the multi-connector on the camera to
the USB port on the computer using the
provided USB cable.
• Refer to your computer’s instruction manual to locate the
position of the USB port.
• The camera turns on automatically.
• The monitor turns on and the selection screen for the USB
connection is displayed.
3 Select [PC], and press e.
Connecting the camera to a computer
Monitor
Connector cover
Multi-connector
OK
IN
SET
USB
PC
EASY PRINT
CUSTOM PRINT
EXIT
d4351_e_0000_7.book Page 48 Wednesday, August 1, 2007 1:52 PM
