


ProSeal Instructions for All Olympus XA style Cameras
Please read these instructions completely before you start. Knowledge will increase your
confidence, and like most jobs, this is better done right the first time. I’ve tried to keep things
as easy and logical as possible while still providing a great amount of detail for you. Sealing your
camera is one of the best ways to restore it to like-new performance, and these are excellent
cameras. You have been given this set of instructions for any of several reasons. You should
have already read and understood the general directions which accompany my light seal kits.
You may need: (1) a safe surface to work on—cardboard, fiberboard, newspaper or anything else
handy—it is important to protect the surface beneath you. (2) Solvent. Naphtha (cigarette
lighter fluid) or denatured alcohol are my two favorites. (3) 2 or 3 paper towels. (4) some
toothpicks or your bamboo tool—a wooden cuticle stick is also handy. (5) a safety razor blade,
hobby knife, or small scissors and a metal straightedge. (6) a small screwdriver (7) a pair of
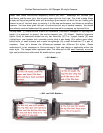
tweezers. Now, let's discuss the differences between the different XA styles. Please
understand it is not uncommon to find variations of light seal design or application within the
same style. The images below represent what I’ve observed as the most commonly occurring
light seal architecture within each XA model style or group:
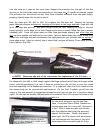
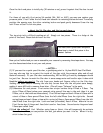
~~XA Model~~
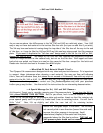
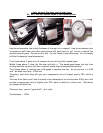
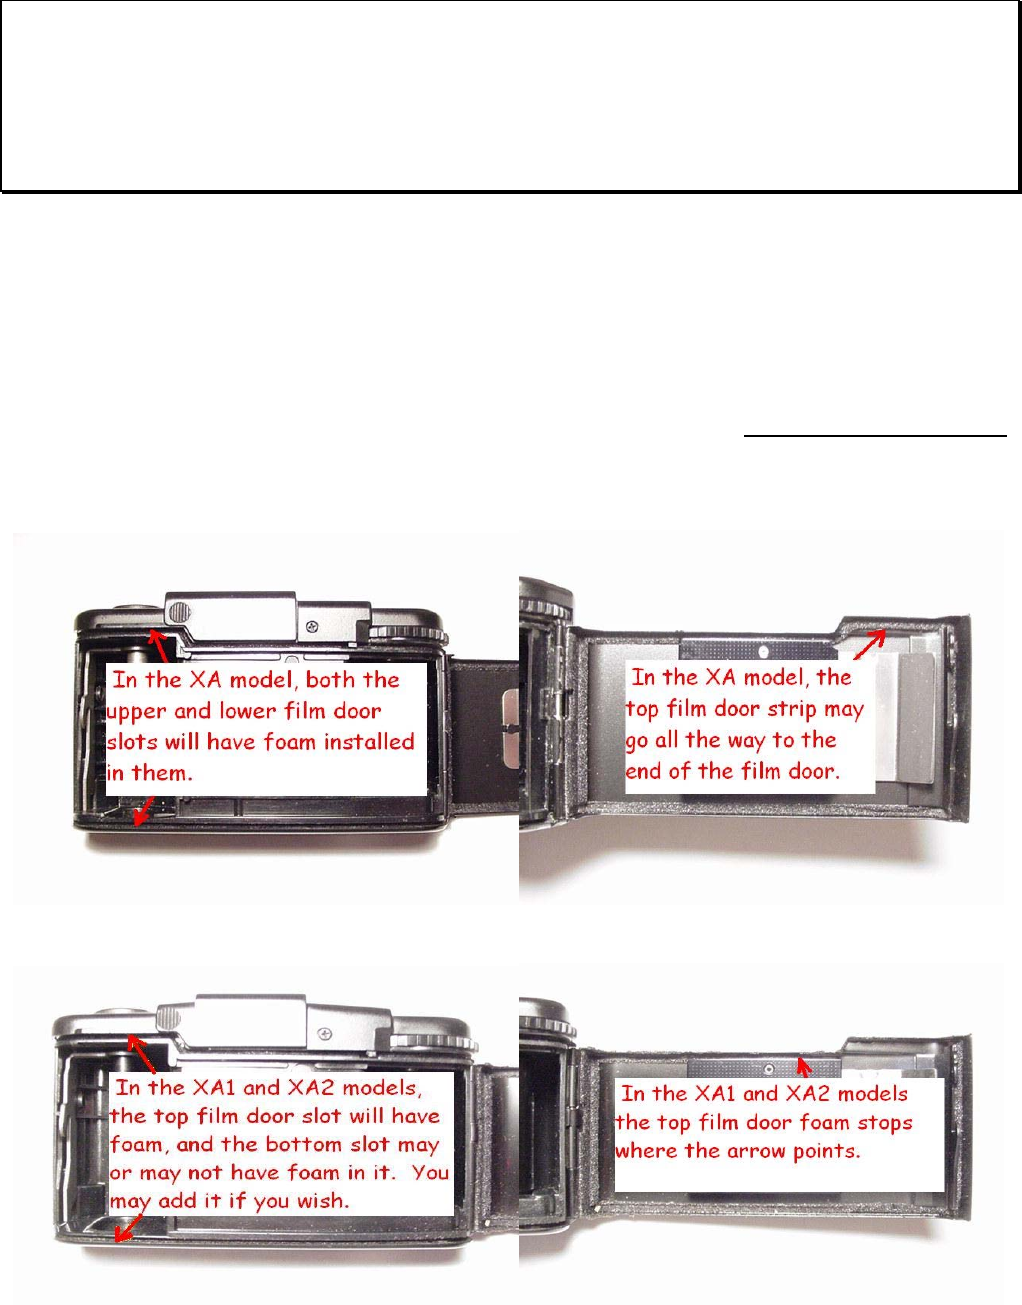
~~XA1 and XA2 Models~~