


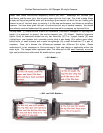
trim the strip so it stops at the reset lever. Repeat this procedure for the part of the slot
starting at the film frame reset and extending to the hinge end.
If needed or desired, repeat
this procedure for the bottom rail slot. Now, with a blunted toothpick trace the seal’s length,
pressing it gently down into its slot to seat it.
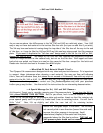
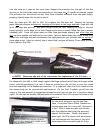
Now, for those with XA, XA1 or XA2, let’s replace the film door seal. Remove the backing
paper, lick
the adhesive and start at the edge of the door on the hinge end side—flush with the
lip of the edge (see picture). Run each straight down the door, keeping the edge of the seal
butted straight to the edge of the door flange and be sure to evenly follow the door’s contour
(rounded) part. Press into place when you have them positioned properly and after they are
dry…use your bamboo tool-wide end to seat them. (picture below shows how these should look)
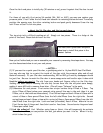
Please note the hinge end seal sits between the edge pieces you just installed and not on top
of
those edge strips. Here is a view of how it should look, and you will notice I have used the 1mm
fabric seal for this XA2:
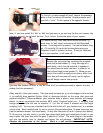
>>>NOTE: Please see the end of the instructions for explanation of the XA door.<<<
For those with the XA3 or XA4, simply replace the hinge end seal (with 1.5mm thick open-celled
foam), carefully positioning it so that it does not extend into the rail slot or over the raised
area corresponding to the handstrap connection. It is important that this little raised area on
the camera body not be covered with seal material. On the first 3 models, you will see the
cutout in the seal material is exaggerated around the slot (you can see this in the photo above
right). On the last two models, the seal material is cutout so that it fits around this area on the
camera body. You will understand this when you look at it.
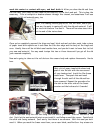
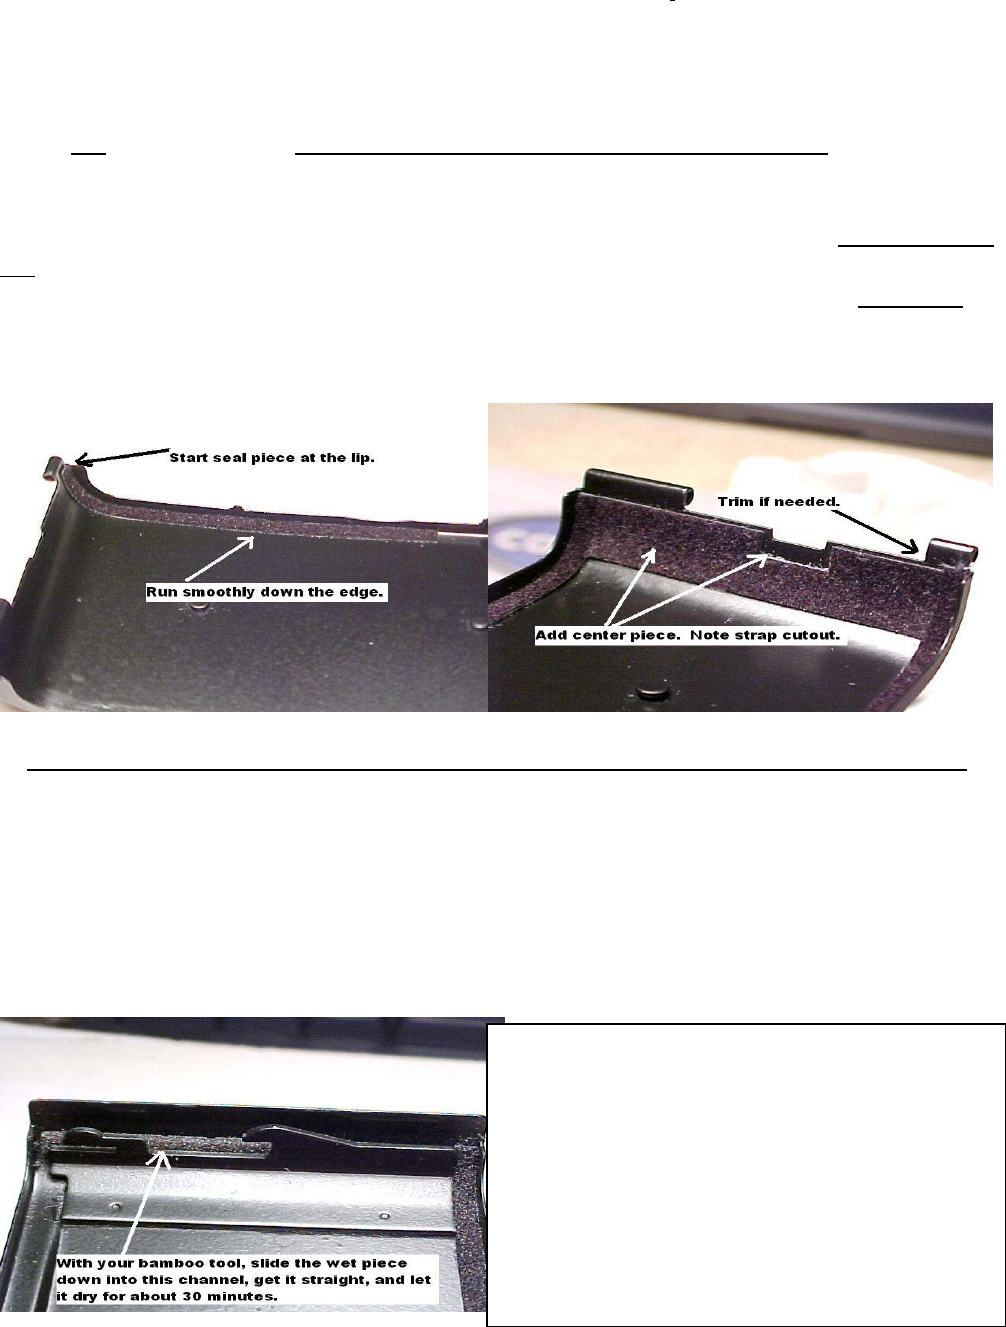
For the latch end piece, you may use 2mm
foam. Cut a piece 2mm x 47mm. Remove the
backing paper and lick it very well. Saturate it,
in fact. Slide it down the door into the slot,
with the adhesive side facing the upturned
edge of the film door. I know…this doesn’t
seem right. But I’ve found it will work better.
Line the foam up with the piece of the latch
plate where the arrow points and let it dry.