


Recording
- 114 -
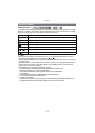
∫ Auto White Balance
Depending on the conditions prevailing when pictures are taken, the pictures may take on
a reddish or bluish tinge. Furthermore, when a multiple number of light sources are being
used or there is nothing with a colour close to white, Auto White Balance may not function
properly. In a case like this, set the White Balance to a mode other than [AWB].
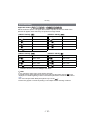
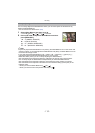
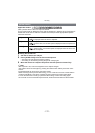
1 Auto White Balance will work within this range.
2 Blue sky
3 Cloudy sky (Rain)
4 Shade
5 Sunlight
6 White fluorescent light
7 Incandescent light bulb
8 Sunrise and sunset
9 Candlelight
KlKelvin colour Temperature
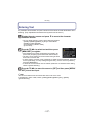
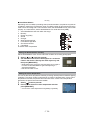
Set the White Balance value. Use to match the condition when taking photographs.
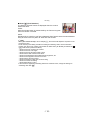
1 Select [ ] or [ ] and then press 1.
2 Aim the camera at a sheet of white paper etc. so that the
frame in the centre is filled by the white object only and
then press [MENU/SET].
•
White Balance may not be set when the subject is too bright or
too dark. Set the White Balance again after adjusting to
appropriate brightness.
• Exit the menu after it is set.
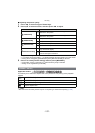
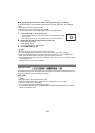
You can set the colour temperature manually for taking natural pictures in different lighting
conditions. The colour of light is measured as a number in degrees Kelvin. As the colour
temperature increases, the picture becomes more bluish. As the colour temperature
decreases, the picture becomes more reddish.
1 Select [ ] and then press 1.
2 Press 3/4 to select the colour temperature and then
press [MENU/SET].
•
You can set a colour temperature from [2500K] to [10000K].
Setting the White Balance manually
Setting the colour temperature
1
2