


- 3 -
Taking a Picture with Face Recognition
Function ..................................................69
• Face Settings....................................70
Entering Text...........................................73
Using the [Rec] Menu..............................74
• [Picture Size].....................................74
• [Quality].............................................75
• [Sensitivity]........................................76
• [White Balance].................................77
• [AF Mode] .........................................79
• [Quick AF].........................................81
• [Face Recog.]....................................81
• [i.Exposure].......................................81
• [Min. Shtr Speed] ..............................82
• [i.Resolution] .....................................82
• [Digital Zoom]....................................82
• [Burst]................................................83
• [Color Mode] .....................................84
• [AF Assist Lamp]...............................84
• [Red-Eye Removal]...........................84
• [Stabilizer] .........................................85
• [Date Stamp].....................................85
• [Clock Set].........................................85
Using the [Motion Picture] Menu.............86
• [Rec Mode]........................................86
• [Rec Quality] .....................................86
• [Continuous AF] ................................87
• [Wind Cut] .........................................87
Playback/Editing
Various methods of playback..................88
• [Slide Show]......................................89
• [Filtering Play] ...................................91
• [Calendar] .........................................92
Having Fun with Recorded Pictures........93
• [Auto Retouch] ..................................93
• [Creative Retouch] ............................94
Using the [Playback] Menu .....................95
• [Upload Set] ......................................95
• [Title Edit]..........................................97
• [Text Stamp]......................................98
• [Video Divide]..................................100
• [Resize]...........................................101
• [Cropping] .......................................102
• [Favorite].........................................103
• [Print Set] ........................................104
• [Protect]...........................................106
• [Face Rec Edit] ...............................107
• [Copy]..............................................108
Connecting to other equipment
Playing Back Pictures on a TV
Screen...................................................109
• Using VIERA Link (HDMI)...............111
Playing back 3D pictures.......................113
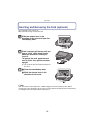
Saving the Recorded Still Pictures and
Motion Pictures......................................115
• Copy by inserting the SD card into
the recorder.....................................115
• Copy the playback image using an
AV cable..........................................116
• Copying to a PC using
“PHOTOfunSTUDIO”......................117
Connecting to a PC ...............................118
• Acquiring of still pictures and [MP4]
motion pictures (other than
[AVCHD] motion pictures)...............119
• Uploading the images to sharing
sites.................................................121
Printing the Pictures..............................122
• Selecting a single picture and
printing it .........................................123
• Selecting multiple pictures and
printing them ...................................123
• Print Settings...................................124
Others
Screen Display ......................................127
Cautions for Use....................................129
Message Display...................................134
Troubleshooting.....................................136