


10
VQT5K48 (ENG)
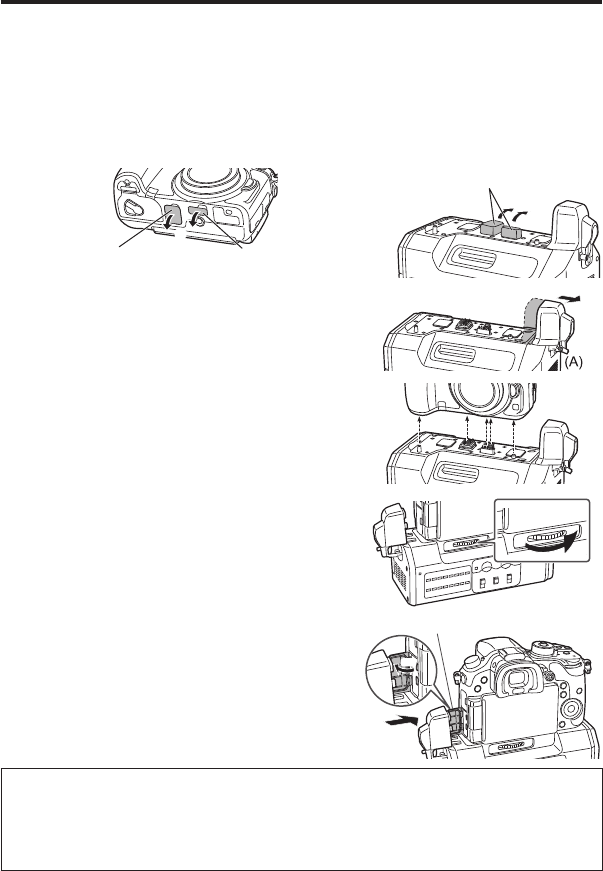
Mounting to the Digital Camera
Make sure that a DC power supply is not connected to the unit’s DC IN terminal and that the
digital camera is turned off.
(Mounting or dismounting while the power is on may result in malfunction.)
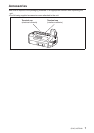
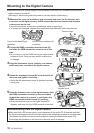
1 Remove the cover for the battery grip connector and cover for the interface unit
connector on the digital camera, and remove the electrical contact and interface
contact caps on the unit.
Store the connector covers and contact caps safely to avoid loss.
To protect the terminals, reattach the covers and caps after you finish using the unit.
Cover for the battery grip
connector
Cover for the interface unit
connector
Terminal caps
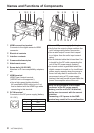
2 Loosen the HDMI connection terminal screw (A),
and slide the HDMI connection terminal out to the
side.
Do not twist or pull the HDMI connection terminal with
excessive force. Doing so may result in malfunction
or damage.
3 Align the attachment screw, contacts, and camera
attachment pins, and attach the digital camera.
4 Rotate the attachment screw (B) in the direction of
the arrow and tighten it securely.
Verify that the attachment screw is tightened securely
during use.
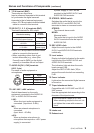
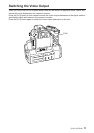
5 Open the terminal cover on the digital camera, slide
the HDMI connection terminal on the unit inward
(toward the camera) to connect it, and tighten the
HDMI connection terminal screw (A) securely.
Open the terminal cover on the digital camera 90
degrees, and store it in the HDMI connection terminal.
(B)
Terminal cover
90°
(A)
Dismounting from the digital camera
Make sure that a DC power supply is not connected to the unit’s DC IN terminal and that
the digital camera is turned off, and then perform the mounting procedure in reverse order
(disconnect the HDMI connection terminal before rotating the attachment screw (B)).
Performing the procedure in the incorrect order may result in damage.