


19
01012001
*
*
*
*
*
*
*
*
*
*
D
*
*
*
*
*
*
*
*
*
*
*
A
4
*
*
*
*
*
*
*
*
*
*
Y
F
*
*
*
*
*
*
*
*
*
*
L
I
*
*
*
*
*
*
*
*
*
*
I
N
[
*
*
*
*
*
*
*
*
*
G
T
*
–
*
*
*
–
*
*
*
H
I
*
–
*
*
*
–
*
0
T
M
*
–
*
*
*
–
*
1
*
*
E
*
*
*
*
*
*
*
–
*
S
*
*
T
*
0
*
D
*
0
*
A
E
A
*
I
*
0
*
A
*
1
*
V
D
*
M
*
:
*
T
*
–
*
I
J
*
E
*
0
*
E
*
2
*
N
U
*
*
*
0
*
*
*
0
*
G
S
*
–
*
*
*
–
*
0
*
S
T
*
–
*
*
*
–
*
1
*
]
*
–
*
*
*
–
*
*
*
*
*
*
*
*
*
*
*
*
*
*
*
*
*
*
*
*
*
*
*
*
*
*
*
*
*
*
*
*
*
*
*
*
*
*
*
*
*
*
*
*
*
*
*
*
*
*
O
O
*
*
*
*
*
*
O
O
*
*
F
F
*
*
*
*
*
*
N
N
*
*
F
F
*
*
*
*
*
*
*
*
*
*
*
D
*
*
*
*
*
*
*
*
*
*
*
A
4
*
*
*
*
*
*
*
*
*
*
Y
F
*
*
*
*
*
*
*
*
*
*
LI
*
*
*
*
*
*
*
*
*
*
I
N
[
*
*
*
*
*
*
*
*
*
G
T
*
–
*
*
*
–
*
*
*
H
I
*
–
*
*
*
–
*
0
T
M
*
–
*
*
*
–
*
1
*
*
E
*
*
*
*
*
*
*
–
*
S
*
*
T
*
1
*
D
*
0
*
A
E
A
*
I
*
2
*
A
*
1
*
V
N
D
*
M
*
:
*
T
*
–
*
I
U
J
*
E
*
3
*
E
*
2
*
N
*
U
*
*
*
0
*
*
*
0
*
G
*
S
*
–
*
*
*
–
*
0
*
S
*
T
*
–
*
*
*
–
*
1
*
]
*
–
*
*
*
–
*
*
*
*
*
*
*
*
*
*
*
*
*
*
*
*
*
*
*
*
*
*
*
*
*
*
*
*
*
*
*
*
*
*
*
*
*
*
*
*
*
*
*
*
*
*
*
*
*
*
O
O
*
*
*
*
*
*
O
O
*
*
F
F
*
*
*
*
*
*
N
N
*
*
F
F
*
1
0
*
*
*
*
*
*
*
*
*
*
2
1
*
*
*
*
*
*
*
*
*
4
:
–
*
*
*
*
*
*
*
*
*
F
3
0
*
*
*
*
*
*
*
*
*
I
0
1
*
*
*
*
*
*
*
*
*
N
:
–
*
*
*
*
*
*
*
*
*
0
2
*
*
*
*
*
*
*
*
*
1
0
*
*
*
*
*
*
*
*
*
*
0
*
*
*
*
*
*
*
*
*
*
*
1
*
*
*
*
*
*
*
*
*
*
*
*
*
*
*
*
*
*
*
*
E
2
M
*
*
*
*
*
*
*
*
*
N
4
O
*
*
*
*
*
*
*
*
*
U
H
N
*
*
*
*
*
*
*
*
*
*
*
*
*
*
*
*
*
*
*
*
*
*
*
*
*
*
*
*
*
*
*
*
*
*
*
*
*
*
*
*
*
*
*
*
*
*
*
*
*
*
*
*
*
*
*
*
*
*
*
*
*
*
*
*
*
*
*
*
*
*
*
*
*
*
*
*
*
*
*
*
*
*
*
*
*
*
*
*
*
*
*
*
*
*
*
*
*
*
*
*
*
O
*
*
*
*
*
*
*
O
O
*
*
F
**
*
*
*
*
*
*
N
N
*
*
F
*
*
T ADJ
*
*
*
*
*
*
*
*
*
*
*
*
*
*
*
*
*
*
*
*
*
*
*
4
*
*
*
*
*
*
*
*
*
*
*
F
*
T
O
V
S
A
B
P
H
H
*
I
N
I
R
L
U
R
O
O
*
M
S
D
I
A
Z
O
L
U
*
E
C
E
/
R
Z
G
I
R
*
R
O
E
M
E
R
D
*
A
E
/
X
/
R
A
A
M
[
D
E
V
T
S
/
M
Y
E
M
M
J
N
T
*
E
I
*
*
T
E
U
/
R
M
N
N
T
S
E
N
S
F
*
O
S
*
I
E
R
U
T
.
M
D
O
O
M
T
*
]
*
D
O
E
R
U
E
*
*
*
*
*
I
D
*
*
T
R
*
*
*
*
*
S
E
*
M
*
*
*
*
*
*
P
*
*
O
*
*
*
*
*
*
*
*
*
*
*
D
*
*
*
*
*
*
*
*
M
*
*
E
*
*
*
*
*
*
*
*
O
*
*
*
*
*
*
*
*
*
*
*
D
*
*
*
*
*
*
*
*
*
*
*
E
*
*
O
O
*
*
O
O
*
*
*
*
*
*
N
N
*
*
N
N
*
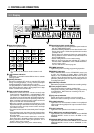
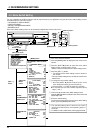
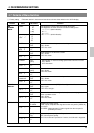
ALARM RECALL/POWER LOSS
RESET/
CANCEL
MENU
TIME MODE
SHIFT
ON SCREEN
SET
–
+
REC
EJECT
REC REVIEW REC
PAUSE/
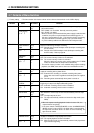
STILL
MENU TIME MODE
SET
ON SCREEN
SHIFT
/REW
PLAY FF/
REV PLAY
TRACKING
V. LOCK
TIMER
SEARCH COUNTER
LOCK CNT RESET
RESET
/
CANCEL
STOP
REV ADV FWD ADV
POWER
HDR
POWER
AG-
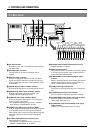
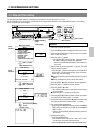
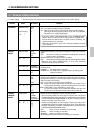
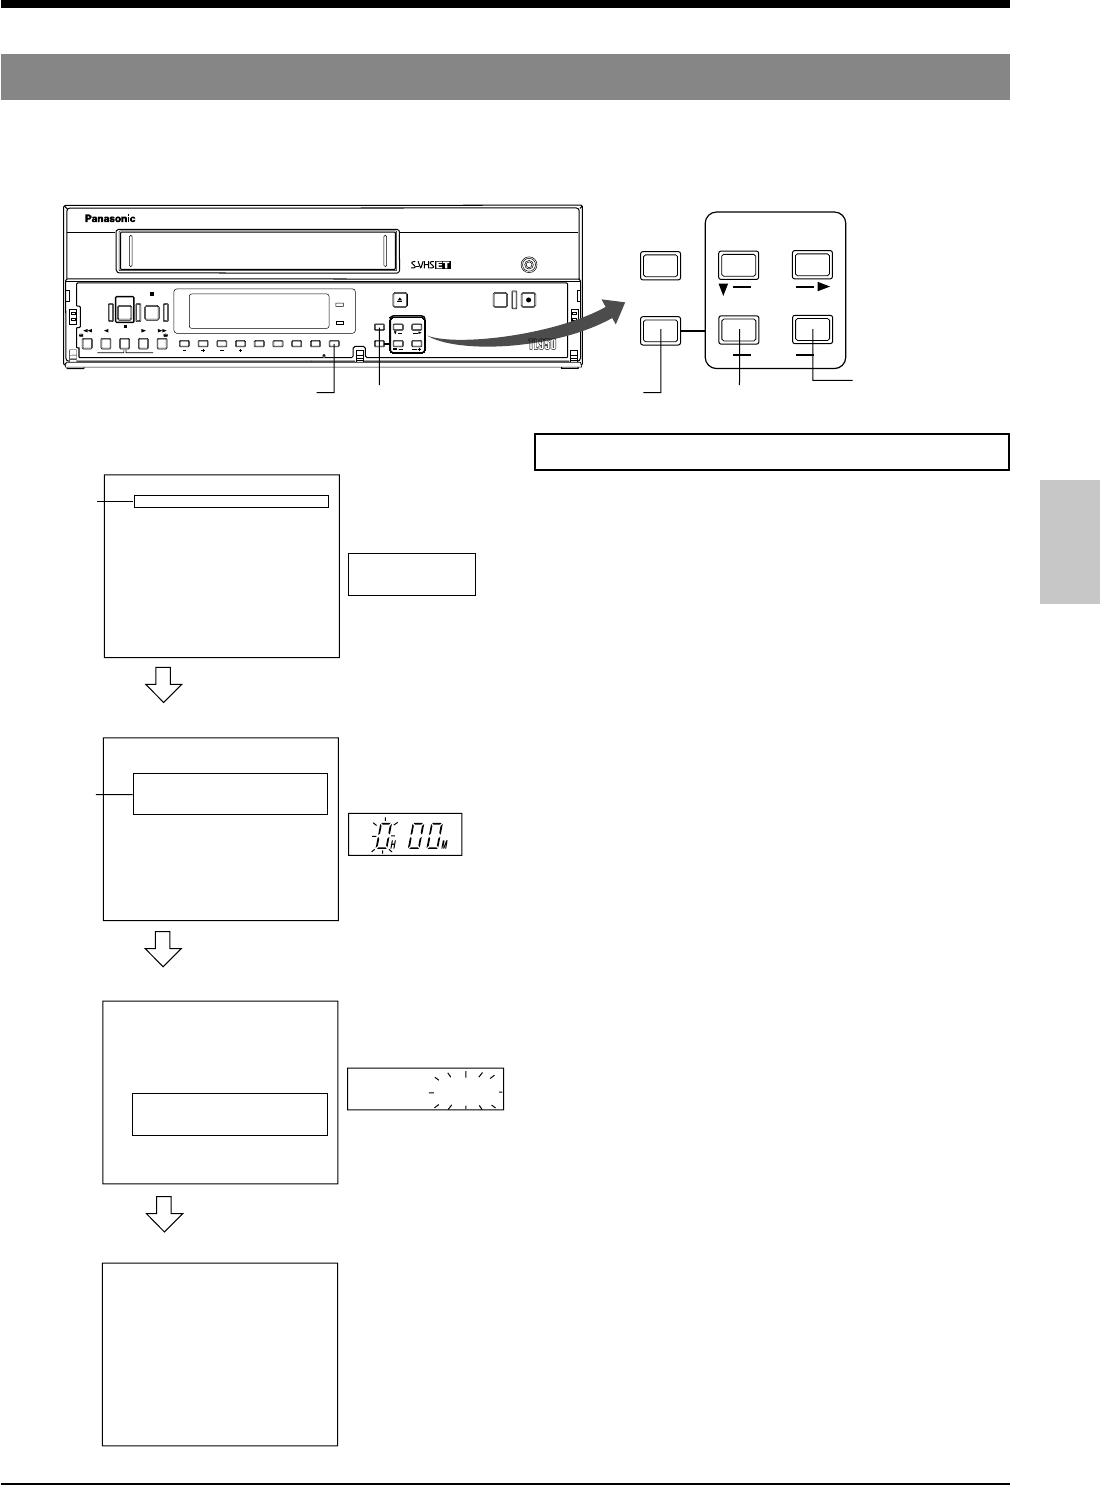
4-3 Date and Time Setting
The time/date generator and timer recording will not function if the time and date are not set.
Set the month/day/year, hour/minute and Summer Time Compensation ON/OFF on the TIME ADJUST screen. The setting
can be checked even on the display.
4 ON-SCREEN/MENU SWITCHES
[SET –] button
Operation
1 Turn on the monitor and VCR.
2 Press the [MENU] button to display the main menu screen.
3 Press the [SHIFT 7] button to set the cursor on <CLOCK
SET> on the main menu.
4 Press the [SET +/–] button.
[The <CLOCK SET> screen is shown. The cursor shows
the <TIME> setting item and the hour digit blinks.
* Check that <DAYLIGHT SAVINGS> on the last line is
set to “OFF.
5 Set the “hour” by pressing the [SET +/–] button. This VCR
uses the 24-hour system.
• Press the [SET +] button to increase the numerical value
and the [SET –] button to decrease it (same for minute,
month, day and year setting).
5 During summer time period, set the time with a one-hour
delay.
5 During standard time period, set the actual time.
6 Press the [SHIFT t] button so that the minutes digit blinks.
7 Press the [SET +/–] button to set the minutes.
8 Press the [SHIFT 7] button.
[The <DATE> setting item is shown by the cursor and the
year item blinks.
5 Press the [SET +/–] button to set the year.
9 Press the [SHIFT t] button so that the month item blinks
and set the month with the [SET +/–] button.
0 In the same way, press the [SHIFT t] button so that the day
item blinks and set the day with the [SET +/–] button.
! For summer time compensation
• Press the [SHIFT 7] button to set the cursor to <SUMMER
TIME> and press the [SET +/–] button to set <SUMMER
TIME> to “ON”.
[The time is automatically adjusted one hour forward in
the summer.
@ End date/time setting.
• Press the [MENU] button.
[The monitor screen returns to the main menu screen
and the time count starts from 00 second.
• Press the [MENU] button again to restore the normal screen.
TIME ADJUST screen
Cursor
indication
[SET +] button
[MENU] button
[RESET/CANCEL]
button
[CNT/RESET] button
Cursor
indication
VCR's display
Main menu screen
[SET +/–] button
[SHIFT 7/t] and
[SET +/–] buttons
Press twice the [MENU]
button.
Normal screen