


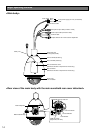
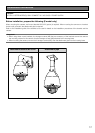

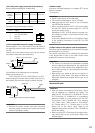
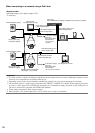
Step 5
Attach the front and rear sunshields (accessory) to the
camera.
q Put the fingers on the dents of the front and rear sun-
shields to detach the hooks. The sunshields will be
divided into two parts.
For loss prevention, one side of the front and rear
sunshields are linked together with a wire.
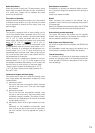
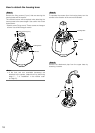
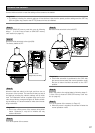
w Locate the front and rear sunshields to the position
that covers the housing base.
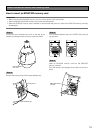
e Joint both sides of front and rear sunshields.
Joint the hook and dent on the linked side, and then
joint the other side.
Front and rear sunshields
Safety wire
Main sunshield
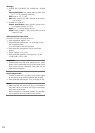
Important:
• Joint both sides of the front and rear sunshields
before fitting in the main sunshield.
• Donottrapthesafetywireinside.
• Thesafetywireisdesignedtosupportonlytheweight
of the camera when the camera falls.
Do not put an excessive weight that the safety wire
cannot support.
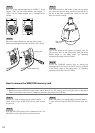
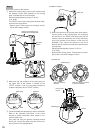
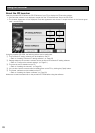
Step 6
Fit the front and rear sunshields in the main sunshield.
Align "h" of the rear sunshield to "g START" of the main
sunshield. Then, turn the front and rear sunshields toward
"g LOCK" until a click is heard.
Front and rear sunshields
Main sunshield
Align "
h
" to this "
g
".
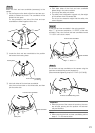
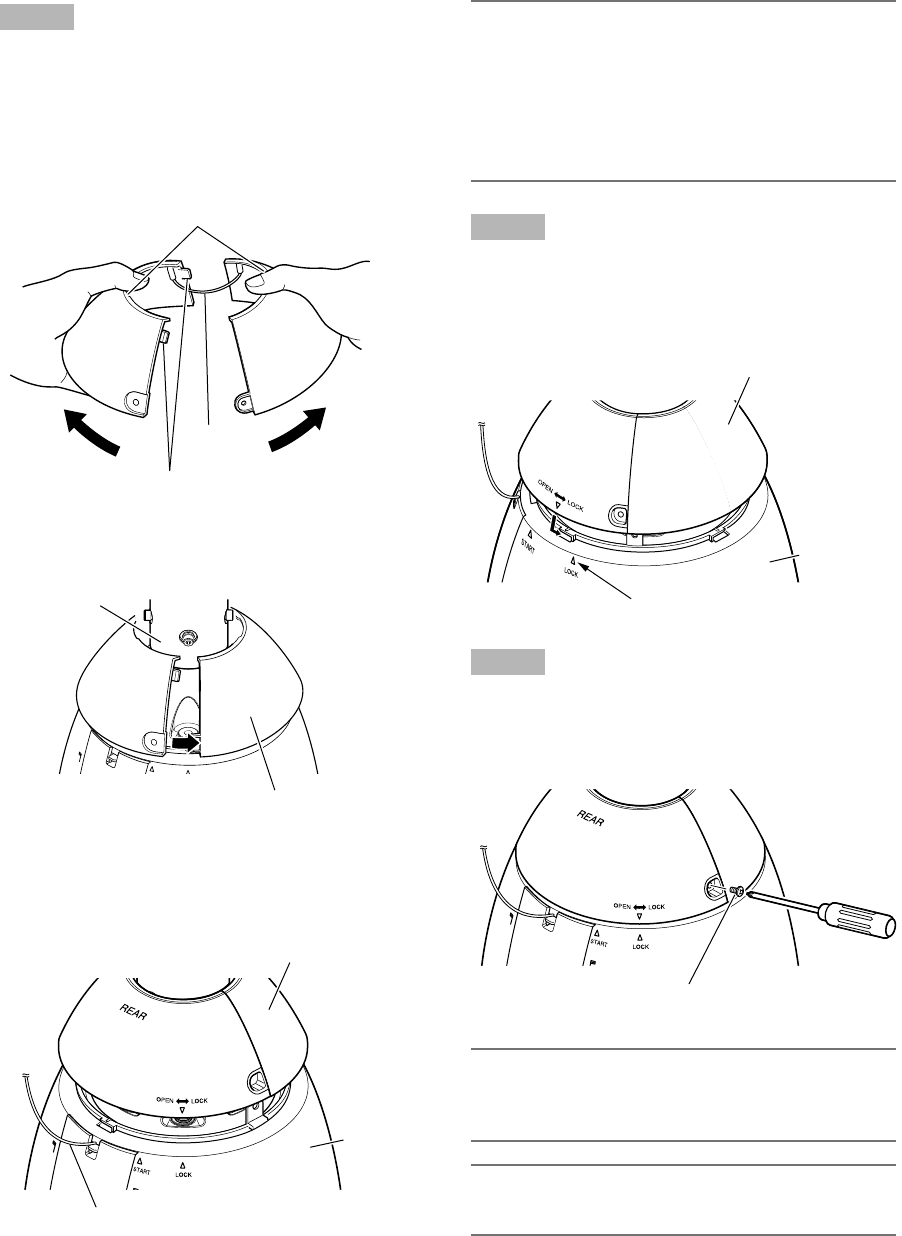
Step 7
Fix the front and rear sunshields on the camera using the
front/rear sunshield fixing screw (accessory).
(Recommended tightening torque: 0.72 N·m {0.53 lbf·ft})
Front/rear sunshields fixing screw
Important:
• Whenthepowerofthecameraisturnedon,thecam-
era will start panning and the position will automati-
cally be initialized.
Note:
• Whenremovingthefrontandrearsunshields,perform
steps 5 - 7 in the reverse order.
Detach the hooks.
Wire
Dents
START
LOCK
Housing base
Front and rear sunshields
(accessory)
21