


[ 6 ] Pelco Manual C2410M-H (10/05)
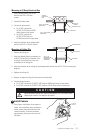
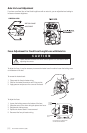
24 VAC JUMPER
12 VDC JUMPER
VIDEO
CONNECTOR
HEATER
CONNECTO
R
01065
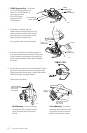
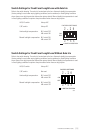
VIDEO
CONNECTOR
HEATER
CONNECTOR
01068
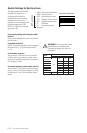
CAMERA BRACKET
TAB ALWAYS POINTS
OUT OF THE
ENCLOSURE
01071
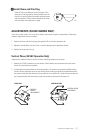
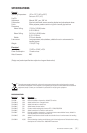
CAMERA BRACKET
TAB ALWAYS POINTS
OUT OF THE
ENCLOSURE
TOP OF
CAMERA
01086
Wall Mounting - The camera bracket
tab points out of the enclosure and the
top of the camera points up towards
the tab.
Ceiling Mounting - The camera
bracket tab points out of the enclo-
sure and the top of the camera is
pointed in the opposite direction.
2. 12 VDC Operation Only - The camera
is set for 24 VAC operation at the
factory. For 12 VDC operation re-
move the jumper from
the 24 VAC position
and install it on the
12 VDC position.
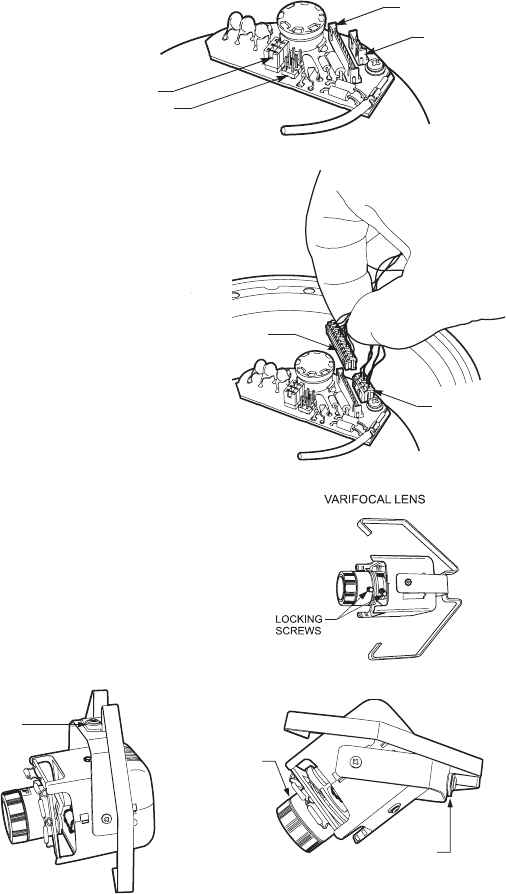
3. If the heater is installed, plug the
heater connector from the camera into the
mating connector inside the base. Plug the
video connector from the camera into the
mating connector inside the base.
Turn on power to the camera and monitor.
4. If you have a varifocal lens, hold the assembly in
your hand and point the lens toward what you want
to view. Loosen the focal length and focus locking
screws. Adjust according to scene detail. Retighten
the screws.
5. Always make sure the tab on the camera bracket is point-
ing out of the enclosure (away from the ceiling or wall).
Gently squeeze the bracket, place it against the shoulder
inside the back box, and gently release.
Proper camera orientation: