6 Pelco Manual C1900M (4/99)
2
4
3
5
6
7
A
L
1
2
3
4
5
6
7
1
1
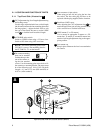
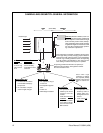
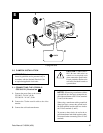
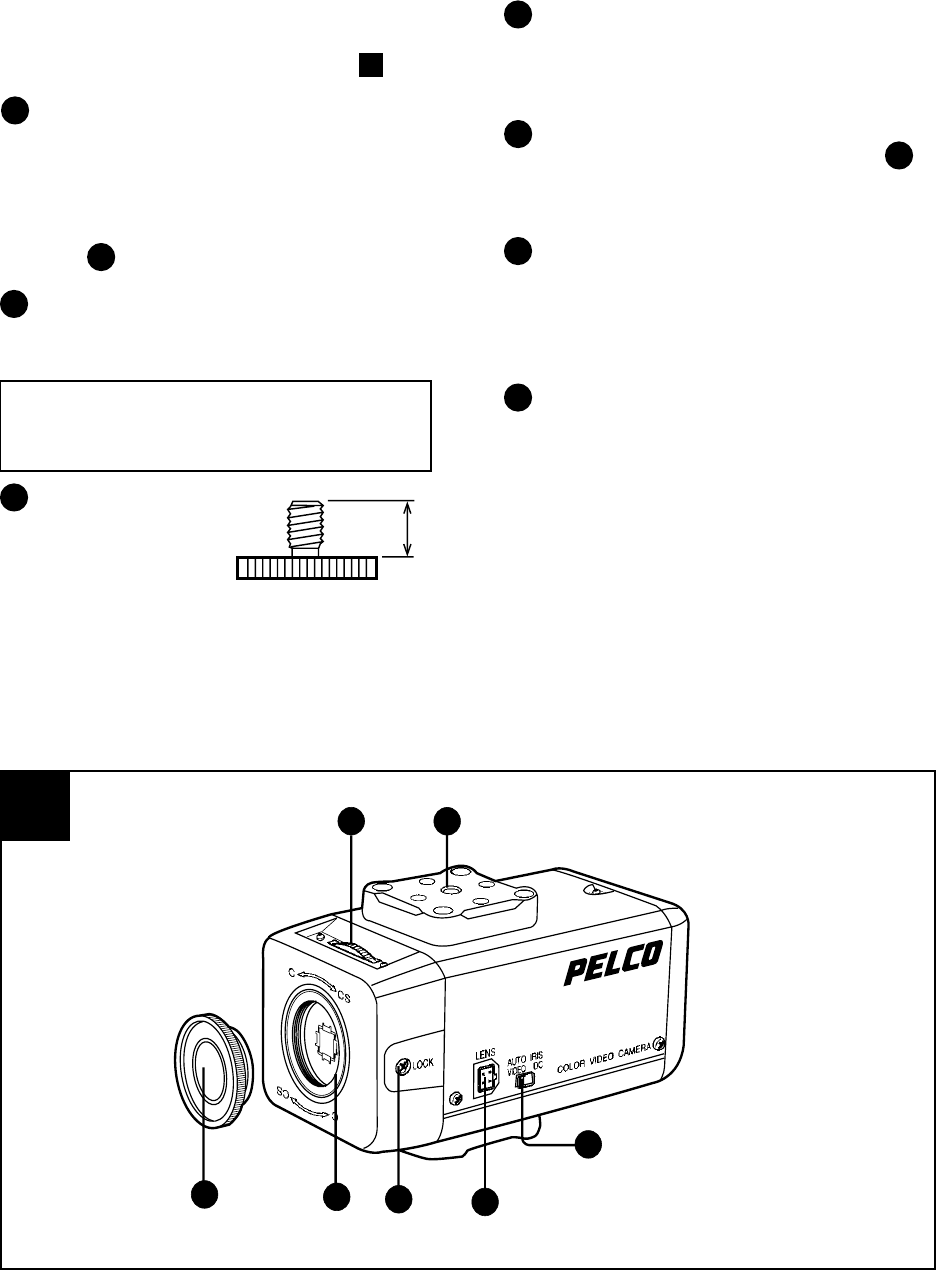
Top/Front/Side View of CC3300 Series Camera
2.1 LOCATION AND FUNCTION OF PARTS
2.1.1 Top/Front/Side (Illustration A )
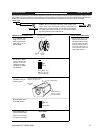
C/CS adjustment ring (focal length adjustment ring
and locking screw)
Use this ring to adjust the back focus, or focal length
(the distance between the lens mounting plane and
the image plane) – adjusts the back focus to suit
the type of lens fitted. Be sure to use the LOCK
screw to lock the back focus/focal length.
AUTO IRIS select switch
Switch to VIDEO when using a VS-servo lens.
Switch to DC when using a DC-servo lens.
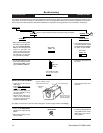
NOTE: The camera mounting plate for the
CC3300-2 is on top. The mounting plate for
the CC3300-2X, -3 is on the bottom.
The camera mounting
plate can be attached
to either the top or bot-
tom of the camera us-
ing the four attached
screws. Use the mounting plate screw hole to fix
the camera to a mounting bracket. The screw must
be of the following type. 1/4 in. UNC (20 pitch)
Length = 4.5 mm ± 0.2 mm (ISO standard) or
0.197 in. (ASA standard).
Lens connector (4-pin socket)
When using an auto iris lens, plug the lens into
this socket. The lens cable plug will have to be
replaced with the plug supplied, before insertion.
Back focus LOCK screw
After adjusting the C/CS adjustment ring to
match the type of lens you are using, turn this screw
with a screwdriver to lock the back focus.
LENS mount (C- or CS-mount)
Use to mount an appropriate C-mount or a CS-
mount lens. To attach a C-mount/CS-mount lens,
turn the focal length adjustment ring to the appro-
priate position.
Lens mount cap
Keep in place whenever the lens is not attached to
the camera.
5


