Pelco Manual C478M-L (11/03) 3
EH3512-3 Same as EH3512 except unit is supplied with 230 VAC heater, defroster,
and blower, 22 watts.
EH3512-3HD Same as EH3512 except unit is supplied with 230VAC heater and defroster,
13 watts.
EH3515 Enclosure, indoor/outdoor, 15.75-inch (40.00 cm) lower body length. (CE)
EH3515-1 Same as EH3515 except unit is supplied with 120 VAC heater, defroster,
and blower, 27 watts.
EH3515-1HD Same as EH3515 except unit is supplied with 120 VAC heater and defroster,
23 watts.
EH3515-2 Same as EH3515 except unit is supplied with 24 VAC heater, defroster, and
blower, 25 watts. (CE)
EH3515-2HD Same as EH3515 except unit is supplied with 24 VAC heater and defroster,
23 watts. (CE)
EH3515-3 Same as EH3515 except unit is supplied with 230 VAC heater, defroster,
and blower, 32 watts.
EH3515-3HD Same as EH3515 except unit is supplied with 230 VAC heater and defroster,
23 watts.
INSTALLATION
The following items are supplied to mount the enclosure:
2 1/4-20 x .500-inch hex head screws
2 Flat washers
2 Split washers
The following items are supplied to mount the camera:
2 1/4-20 x .375-inch Phillips-head screws
Perform the following steps to install the enclosure, camera, and lens:
1. Unlatch and open the lid.
2. Remove the camera sled from the rail.
a. Loosen the screws that hold the camera sled in place.
b. Slide the sled forward so it can be lifted out over the screws.
c. Remove the sled.
d. Remove the parts tied to the sled.
3. If you are wiring the enclosure with cable, remove the glands and nuts from the parts
bag and install them in the bottom of the enclosure. If you are wiring the enclosure
with conduit, do not install the glands.
4. Attach the enclosure body to the appropriate mount using the instructions provided
with the mount.
Attach the enclosure through the threaded mounting holes in the bottom of the enclo-
sure. Use the 1/4-20 x .500 screws and washers provided (in the parts bag). Com-
pletely tighten the screws to attach the enclosure body to the mounting surface.
5. Attach the camera to the sled with the 1/4-20 x .375-inch Phillips-head screws pro-
vided (in the parts bag). You can attach the camera to either side of the sled. The side
of the sled to which you mount the camera depends on the type of camera and lens
you are attaching.
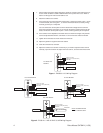
The edges of the sled are bent–one side up and the other side down. On one side of
the sled, the lip is wide; on the other side of the sled, the lip is narrow. In a typical in-
stallation, you mount the camera so that the holes in the wide lip of the sled fit over the
sled mounting screws.
However, you can elevate the sled if you are installing a camera with a low optical cen-
ter line or a camera with a large diameter lens. To elevate the sled (and therefore el-
evate the camera), flip the sled over so that the holes in the narrow lip of the sled fit
over the sled mounting screws.
6. Move the sled so that the sled mounting screws extend through the narrow part of sled
mounting holes, and partially tighten the sled mounting screws.


