6 C3429M-A (1/08)
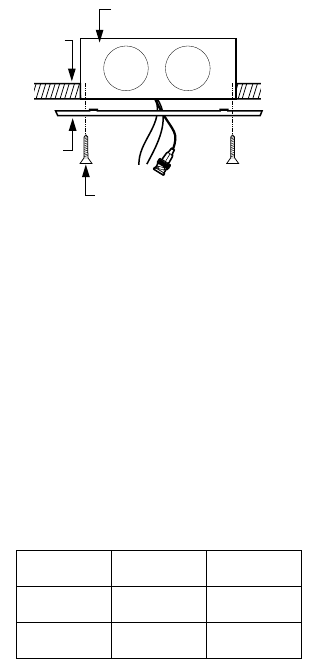
• Mounting to a 2-gang electrical box
Figure 4. Mounting to a 2-Gang Electrical Box
CONNECT VIDEO AND POWER
1. Some indoor installations do not require a heater. If the installation does not require a heater,
disconnect the heater wiring.
a. Remove the cover with the supplied 1/8-inch hollow screwdriver bit.
b. Remove the camera from the mounting bracket, and unplug the 4-pin heater connector in the
base.
c. Reinstall the camera. If the camera has a varifocal lens, leave the cover off; it will be
reinstalled later. Otherwise, reinstall the cover.
2. Connect the power input wires to the power wires of the IS310 base (refer to Table A).
3. Connect the video cable/wires:
• BNC: Connect the BNC connector from the unit to a mating BNC connector.
• UTP: Connect the blue wire to Video +; connect the gray wire to Video -.
Table A. Power Input
Voltage Red Wire Black Wire
12 VDC + Ground
24 VAC ~ ~
2-GANG ELECTRICAL BOX
WALL OR
CEILING
ICS310-AP
ADAPTER
PLATE (NOT
SUPPLIED)
6-32 X 0.50 SECURITY SCREW
(SUPPLIED WITH ADAPTER PLATE)


