


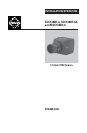


C1963M (8/04) 11
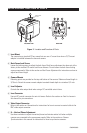
BACK FOCUS ADJUSTMENT
Do not release the back focus locking ring unnecessarily. Back focus adjustment has been set at the
factory to the standard CS-mount back focus distance. However, once a lens is mounted it may be
necessary to adjust back focal length to match the lens being used.
FIXED FOCAL LENGTH LENSES
1. Mount the lens firmly to the camera.
2. With the camera operating, position the camera to view an object at least 30 feet (10 m) away.
3. Set the focus ring to infinity (∞).
4. Set the lens iris to its widest usable opening.
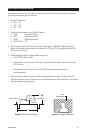
5. Adjust the back focus.
a. Use an Allen wrench to loosen the back focus lock screw at the side of the camera.
b. Turn the lens mount to obtain the sharpest image on the monitor.
c. Turn the back focus locking ring clockwise to tighten.
NOTE: Do not over-tighen the back focus lock screw. Over-tightening the back focus lock screw can
damage the threads on the mount of the lens.
MOTORIZED ZOOM LENSES
1. With the camera operating, position the camera to view an object at least 70 feet (25 m) away.
2. Set the lens in the following manner:
a. Set the lens iris to its widest usable opening.
b. Set the lens focus to the FAR position.
c. Adjust lens zoom to WIDE angle.
3. Adjust back focus until the object is in sharpest focus.
a. Use an Allen wrench to loosen the back focus lock screw at the side of the camera.
b. Turn the lens mount to obtain the sharpest image on the monitor.
c. Turn the back focus locking ring clockwise to tighten.
4. Move lens zoom to TELEPHOTO.
5. Zoom out all the way while observing the focus on the monitor (known as “tracking”). If the
image stays in focus throughout the entire zoom range, the back focus is correct. Otherwise,
repeat the process beginning with step 1.