


152
Shooting Settings
5
2
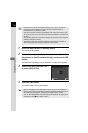
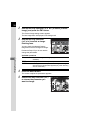
Press the four-way controller
(5), use the four-way controller
(23) to select a setting, and
press the 4 button.
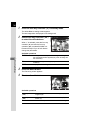
3
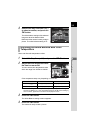
Use the four-way controller (23) to select [Auto Align],
and use the four-way controller (45) to select O or P.
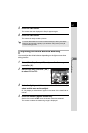
4
Use the four-way controller (23) to select [Exposure
Bracket Value], and press the four-way controller (5).
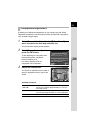
5
Use the four-way controller (23) to set the range in which
to change the exposure, and press the 4 button.
Select from ±1 EV, ±2 EV (default setting) or ±3 EV.
6
Press the 3 button twice.
The camera is ready to take a series of pictures.
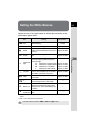
O
Uses Auto Align. Activates Shake Reduction according to the [Shake
Reduction] setting. (default setting)
P
Does not use Auto Align. Deactivates Shake Reduction.
• The procedure of Step 2 can also be performed through the control panel.
• When both Shake Reduction and Auto Align are activated, take note of the
following points.
•
Make sure to hold the camera firmly so that the composition of the picture does
not change while the three images are captured. If there is a great difference
of the composition between three images, Auto Align may not be possible.
• Images captured with HDR Capture are susceptible to camera shake and
blur. Be sure to set a higher shutter speed and a higher ISO sensitivity.
• When the sensitivity is set to [ISO AUTO], the sensitivity can be raised
more easily than normal.
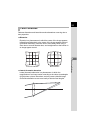
• Auto Align may not be possible when lenses that have a focal length
exceeding 100 mm are used, or when the entire subject is checkered or
has a uniform surface.
•In Z (Night Scene HDR) mode, [HDR Capture] is fixed to [Auto] and the
Auto Align function is enabled.
•
If [One Push File Format] is assigned to the
V
/
Y
button, pressing the button
temporarily deactivates HDR Capture and saves captured images in RAW+.
HDR CaptureHDR Capture
HDR CaptureHDR Capture
Auto AlignAuto Align
Exposure Bracket ValueExposure Bracket Value
CancelCancel
MENU
OKOK
OK