


9
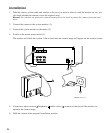
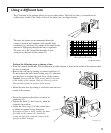
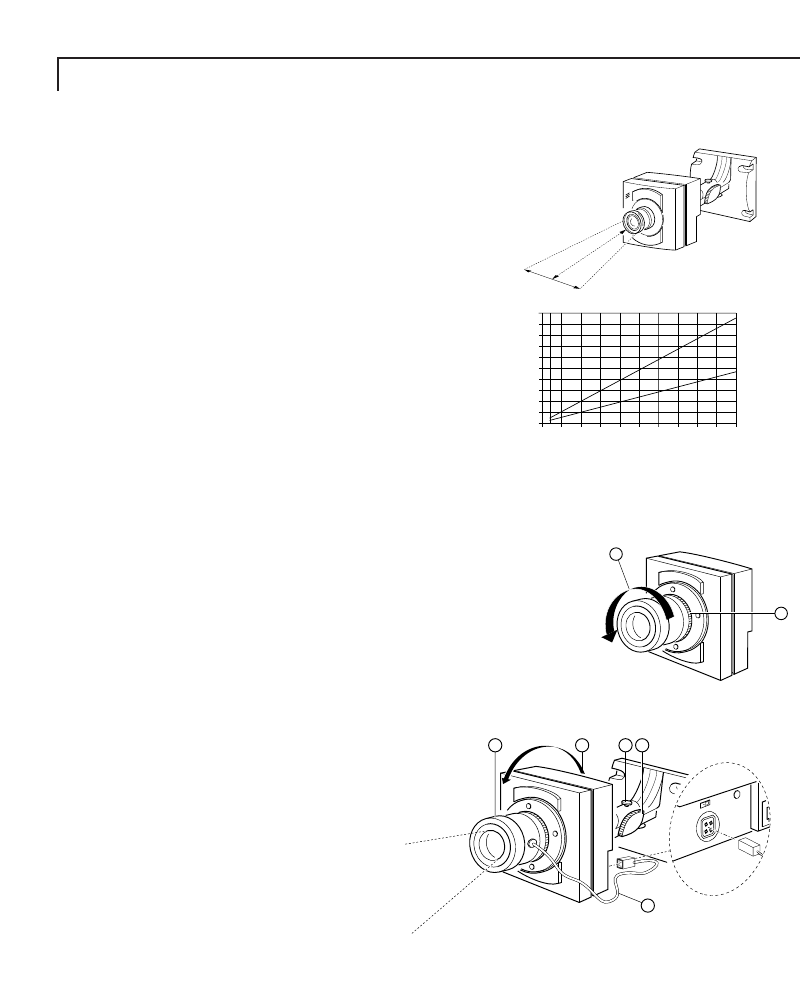
The CS-mount of the camera allows you to use other lenses. The field of view (= covered area) of
an 8mm lens is half of the field of view of the 4mm lens (see figure below).
The auto-iris lenses are recommended when the
camera is used in environments with variable light
conditions (eg. outdoors). By means of the auto-iris the
amount of light going through the lens is regulated.
The auto-iris is DC-controlled through a 4-pole
connector at the back of the camera (3).
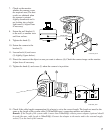
Perform the following steps to change a lens:
• Point the camera downwards. This to minimize possible deposit of dust on the inside of the camera when
the lens is removed.
• Remove the old lens by turning it counter-clockwise (1).
Do not release the back-focus locking ring (2), otherwise
you may have to readjust the back-focus of the camera.
Caution: Never touch the CCD sensor which is located
at the inside of the camera. Only use clean, dry air to
blow particles from the surface of the sensor.
• Mount the new lens by turning it clockwise onto the lens
mount of the camera.
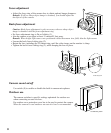
• Direct the camera at the object or area to be
monitored (6).
• Tighten the knob (3) and screw (4) when the
camera is in position.
• Adjust the focus ring (1) of the camera lens
to obtain an optimal image sharpness.
If an auto-iris lens is used, connect the auto-
iris cable to the camera (5). Switch the
system on and off to setup the camera with
specific outdoor settings.
CL 66610005_308A.AI
4 mm
8 mm
108640 2
10
8
6
4
2
0
Horizontal field of view in meters (V)
Focal length of the lens
Distance object to camera in meters (d)
d
V
Using a different lens
CL 66610005_312.AI
R
A
E
N
>
<
R
A
F
2
1
CL 66610005_313.AI
R
A
E
N
>
<
R
A
F
5
1 6
4
3