Remote Control Operation
Running a Slide Show
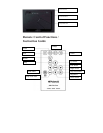
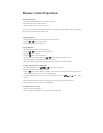
1. Press the SLIDE SHOW button to start slide show mode.
2. Press the STOP button to stop slide show.
3. Press the EXIT button to return to main menu.
Note: If a card is inserted into the Digital Picture Frame, pressing the SLIDE SHOW button will run a Slide
Show of images contained in the memory card.
Adjusting Brightness
1. Press the Brightness button to enter brightness adjustment menu.
2. Press the
or button to adjust contrast.
3. Press the Brightness button again to exit.
Setting OSD Menu
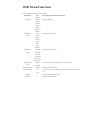
1. Press the SETUP button to access OSD Menu.
2. Press the
or button to select the first class menu.
3. Press the
button to enter it.
4. Press the
button to exit current menu.
5. After you enter the first class menu, press
or button to select the settings you want.
6. Press the ENTER or PLAY button to confirm your choice.
7. Select “Exit Setup” option and press the ENTER or PLAY button to exit the OSD Menu.
Viewing and Editing Pictures Individually
1. In Thumbnail mode, press the
, , or button to select one picture.
2. Press the ENTER or PLAY button to display it.
3. Press the
button to select “NEXT” or “PREV” which shown on the bottom of LCD screen, then press
the ENTER button to enter next or previous thumbnail page.
4. Press the ZOOM button to zoom in or out the current picture. Press the
, , or button to move
around.
5. Press the ROTATE button to rotate the current picture. (Not support in 16:9 picture format)
6. Press the EXIT button to go back to Thumbnail Mode.
Switching the Picture Format
1. Select one picture and display it.
2. Press the Display Type button to switching the picture display format.


