


7
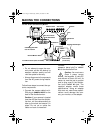
Connect them according to the wiring
diagram (see “Making the Connections”
on Page 9), then plug the AC adapter
into a standard power outlet. Turn on
your TV or monitor. The remote motion
alarm beeps twice and the warning
alert lights steadily. After 60 seconds,
the camera's detection and motion
warning functions are ready.
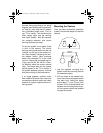
To test the system, move about 3 feet
in front of the camera. The motion
warning tone sounds twice and the red
indicator on the top of the remote mo-
tion alarm flashes, indicating the cam-
era detects motion. Have someone
switch the connected TV to the video
input for viewing the protected area, or
(if you use the Cat. No. 49-2511 Secu-
rity Monitor) select the correct channel
input. The image seen by the camera
should appear on the TV or monitor. If
the system operates properly, proceed
with the mounting of the components.
If no image appears, carefully check
each cable to be certain that none have
reversed connections (audio and video)
and that all system components are re-
ceiving power.
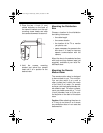
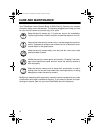
Mounting the Camera
Once you have successfully tested the
system, follow these steps to install the
camera.
1. Use the supplied mounting tem-
plate to mark the mounting holes at
the selected location.
2. Drill two holes at the marked loca-
tions, then thread a supplied screw
into each hole, letting the heads
extend about
3
/
16
-inch (5 mm) from
the wall. Drill a third hole below and
between the mounting holes to per-
mit the camera cable to be inserted
through the surface.
49-2513.fm Page 7 Wednesday, January 19, 2000 4:41 PM