


ENGLISH
6262
Playback
Audio Dubbing (VP-D363(i)/D364W(i)/D365W(i) only)
( VP-D363(i)/D364W(i)/D365W(i))
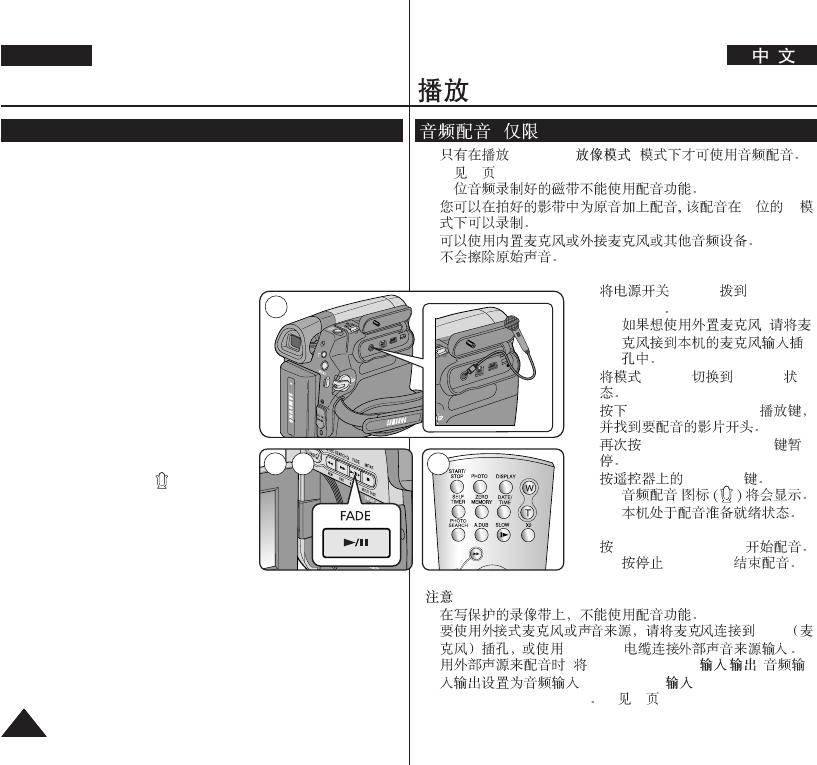
✤ The Audio Dubbing function works only in <Player> mode. ➥page 19
✤ You can not dub sound on a pre-recorded tape in LP or 16 bit mode.
✤ You can add sound to the original sound on a pre-recorded tape
recorded in SP mode with 12bit sound.
✤ Use the internal or an external microphone(not supplied) or other
audio equipment.
✤ The original sound will not be erased.
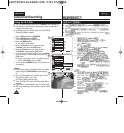
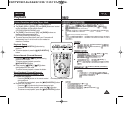
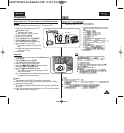
1. Set the [Power] switch to [PLAYER].
■
If you want to use an external
microphone, connect the microphone to
the external MIC input jack on the
Camcorder.
2. Set the [Mode] switch to [TAPE].
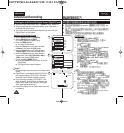
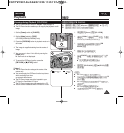
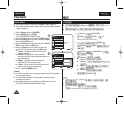
3. Press the [
√√
/❙❙ (PLAY/STILL)] button and
find the time frame of the scene to be
dubbed.
4. Press the [
√√
/❙❙ (PLAY/STILL)] button to
pause the scene.
5. Press the [A.DUB] button on the remote
control.
■
Audio Dubbing icon ( ) is displayed.
■
The Camcorder is ready for dubbing.
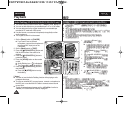
6. Press the [
√√
/❙❙ (PLAY/STILL)] button to
start dubbing.
■
Press the [■ (STOP)] button to stop
the dubbing.
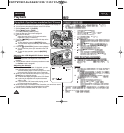
[ Notes ]
■
You can not use the Audio Dubbing function while playing a write
protected video tape.
■
To utilize an external MIC or sound source, connect a microphone to
the MIC jack or use the Multi-AV Cable to connect external sound
source input.
■
To dub an external sound source, set the <AV In/Out> function to
<AV In> (VP-D363i/D364Wi/ D365Wi). ➥page 67
✤
<Player> ( )
➥
19
✤
16
✤
12 SP
✤
✤
1. [Power]
[PLAYER]
■
,
2. [Mode] [TAPE]
3. [
√√
/
■ ■
(PLAY/STILL)]
4. [
√√
/
■ ■
(PLAY/STILL)]
5. [A.DUB]
■
■
6. [
√√
/
■ ■
(PLAY/STILL)]
■
[
■
(STOP)]
[ ]
■
■
MIC
Multi-AV
■
, <AV In/Out> (AV / )
<AV In> (AV ) (VP-
D363i/D364Wi/ D365Wi)
➥
67
P
L
A
Y
E
R
C
A
M
E
R
A
Q
U
IC
K
M
E
N
U
M
IC
D
V
U
S
B
A
V/
S
√
1
3 4 5