


Advanced Recording
6363
ENGLISH DEUTSCH
Weiterführende Funktionen
✤ The AUDIO DUBBING function only works in PLAYER Mode.
✤ You can add sound to the original sound on a pre-recorded tape,
recorded in SP mode with 12bit sound.
✤ Use the internal and external microphones or other audio equipment.
✤ The original sound will not be erased.
Dubbing sound
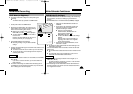
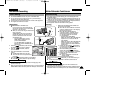
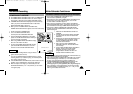
1. Set the camcorder to PLAYER mode.
■
If you want to use an external microphone,
connect the microphone to the external MIC
input jack on the camcorder.
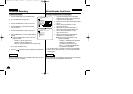
■
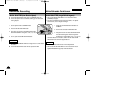
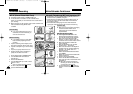
When you wish to dub using the External A/V
input, connect the
AUDIO/VIDEO cable to the camcorder by
inserting the cable jack into the A/V in/out
terminal at the left side of the camcorder.
(VP-D20i/D21i only)
- Press the MENU button, turn the
MENU DIAL to highlight A/V and
press the ENTER button.
- Turn the MENU DIAL to highlight AV
IN/OUT and press the ENTER button to
select AV IN.
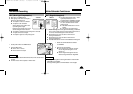
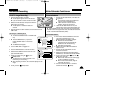
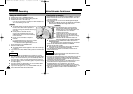
2. Press the (PLAY/STILL) button and find
the timeframe of the scene to be dubbed.
3. Press the (PLAY/STILL) button to
pause the scene.
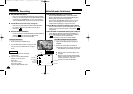
4. Press the A.DUB button on the Remote
Control.
■
A.DUB will be displayed on the LCD.
■
The camcorder is in a ready-to-dub state
for dubbing.
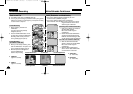
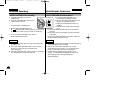
5. Press the (PLAY/STILL) button to start dubbing.
■
Press the (STOP) button to stop the dubbing.
Reference (VP-D20i/D21i only)
■
You can not use the audio dubbing function while playing a write
protected video tape.
■
When you wish to dub using the External A/V input, you must connect the
AUDIO/VIDEO cable to the audio system from which you wish to record.
Audio dubbing
✤ Eine Nachvertonung (Audio Dubbing) ist nur im Wiedergabemodus
(PLAYER) möglich.
✤ Mit dieser Funktion können Sie zu bereits erstellten SP-Aufnahmen mit
12-Bit-Ton eine neue Tonspur (zusätzlich zum Originalton) aufzeichnen.
✤ Verwenden Sie zur Nachvertonung wahlweise das integrierte Mikrofon,
ein externes Mikrofon oder sonstige Audiogeräte.
✤ Der Originalton wird beim Nachvertonen nicht gelöscht.
Vertonung
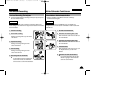
1. Stellen Sie den Betriebsmodus-Schalter des
Camcorders auf PLAYER.
■
Wenn Sie ein externes Mikrofon verwenden
möchten, schließen Sie es an den Eingang
MIC des Camcorders an.
■
Wenn Sie die Audio/Video-Buchse
verwenden möchten, verbinden Sie das
Audio/Video-Kabel mit der A/V-Buchse
auf der linken Seite des Camcorders
(nur VP-D20i/D21i).
- Drücken Sie die Taste MENU.
Wählen Sie mit dem Menü-Einstellrad die
Option A/V aus, und drücken Sie die
Taste ENTER.
- Wählen Sie mit dem Menü-Einstellrad die
Option AV IN/OUT aus, und aktivieren
Sie durch Drücken der Taste ENTER die
Option AV IN.
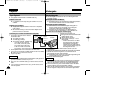
2. Drücken Sie die Taste (PLAY/STILL),
und suchen Sie den Anfang der Szene, die
Sie nachvertonen möchten.
3. Wenn Sie die Stelle gefunden haben,
drücken Sie die Taste (PLAY/STILL)
erneut, um in den Pausenmodus zu wechseln.
4. Drücken Sie die Taste A.DUB auf der
Fernbedienung.
■
Auf dem LCD-Monitor erscheint die
Anzeige A.DUB.
■
Der Camcorder ist jetzt bereit für die Nachvertonung.
5. Drücken Sie die Taste (PLAY/STILL), um die Nachvertonung zu
starten.
■
Um die Nachvertonung wieder zu beenden, drücken Sie die
Taste (STOP).
Hinweise (nur VP-D20i/D21i)
■
Eine Nachvertonung ist nicht möglich, wenn der Löschschutz der
eingelegten Kassette aktiviert ist.
■
Wenn Sie über die A/V-Buchse nachvertonen möchten, schließen Sie das
Audio/Video-Kabel an das Audiosystem an, das verwendet werden soll.
Nachvertonung
S
A
M
S
U
N
G
C
A
M
C
O
R
D
E
R
L
E
N
S
1
0
X
Z
O
O
M
S
A
M
S
U
N
G
C
A
M
C
O
R
D
E
R
L
E
N
S
1
0
X
Z
O
O
M
E
A
S
Y
R
E
C
S
E
A
R
C
H
F
A
D
E
B
L
C
(VP-D20i/D21i only)
AV IN
Audio (R)Audio (L)
00658E D20-UK+GER (60~90) 3/18/03 3:00 PM Page 63