


66
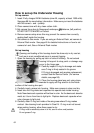
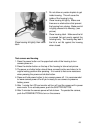
5.Take several pictures of the same subject.
Use different distances and angles. (Allow about 10 seconds between shots for the
flash to re-charge). Study and compare the good and bad pictures and you will soon
be a master.
Never touch any sea creatures. Consult your dive master about approaching
dangerous creatures or structures.
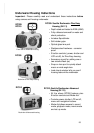
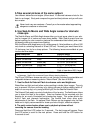
6. Use SeaLife Macro and Wide Angle Lenses for dramatic
close-ups.
The SeaLife Macro and Wide Angle lenses allow you to get super close to your sub-
ject for images full of colors and razor-sharp details. Each SeaLife macro lens has
optical coatings for color correction (reduces the underwater bluish effect) and a neu-
tral density coating to prevent over flashing.
With the 24mm wide-angle lens you fit a close group of 4 dive buddies or a 6-foot (180
cm) shark at a shooting distance of 6 feet (180 cm). Normally you would have to be
10 feet away, too far for a sharp picture. The following lenses are available at your
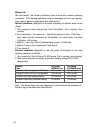
local scuba dive dealer:
Lens description Item # Effective range
No Lens N/A 3.5’ (1m) to infinity
Macro 3X lens/filter SL951 22" to 36" (56 to 90 cm)
Macro 8X lens/filter SL959 (set) 16" to 22" (40 to 56 cm)
Macro 16X lens/filter SL959 (set) 8" to 11" (20 to 28 cm)
24 mm Wide angle lens SL970 2’ (60 cm) to infinity
Field of view about 50% larger.
The above shooting distance only apply to the DC200 and DC310 digital camera with focus set
to Seascape. SeaLife film cameras will have different shooting distances.
The 8X and 16X Macro lenses are sold in a set that also includes the extendable and
collapsible distance-measuring device “Macro Wand” (Set item # SL959)
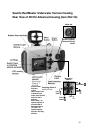
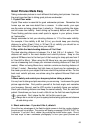
7. Use the SeaLife External Flash to enhance color and brightness.
Water filters out light and red/yellow colors resulting in darker, bluer images. The only
way to prevent this from occurring is by taking pictures at shallow depths (within 5’
depth on a sunny day) or by using artificial light, like the SeaLife External Flash.
The External Flash easily mounts to the bottom of the housing. The flexible arm allows
you to direct the flash at the subject. Even two flashes can be mounted onto the
housing for an evenly illuminated and shadow-free image. This system blocks the
built-in flash and prevents backscatter. The flexible flash arms allow quick
adjustments of the flash. An optional Flash Diffuser can be snapped onto the flash
head and is highly recommended for close-up shots of bright, reflective subjects.
8. The quick review feature allows you to playback pictures without
removing the camera from the housing.
Press and hold the LCD button for 2 seconds. The last image will appear. Press
the LCD button to scroll to the next picture. Press and hold the LCD button for
2 seconds to exit.