


12
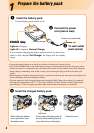
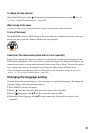
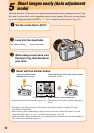
Shoot images easily (Auto adjustment
mode)
The main functions of the camera are adjusted automatically in auto adjustment mode. Using
this mode, you can shoot easily, depending entirely on the camera. However, you can change
any of the settings except [Color/DEC].
t “User’s Guide/Troubleshooting” (page 49)
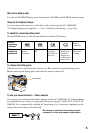
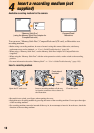
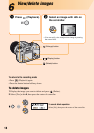
1 Set the mode dial to AUTO.
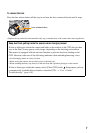
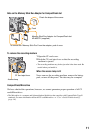
4 Shoot with the shutter button.
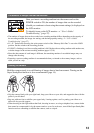
• The image is not displayed on the LCD monitor before the recording is completed. Use the
viewfinder for monitoring.
• After shooting, the recorded image is displayed for two seconds on the LCD monitor. You can
change the display time. t “User’s Guide/Troubleshooting” (page 84)
• While the image is being recorded, the access lamp lights. Do not remove the recording medium or
turn off the power while this lamp is lit.
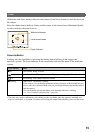
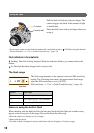
Sensor used for focus adjustment
(Illuminated in red briefly to indicate the point of
focus.)
Focus indicator
(Indicates the status of the autofocus (page 15))
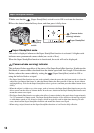
Press the shutter button
halfway down to focus.
Press the shutter button fully down to shoot.
The shutter sounds.
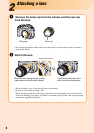
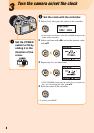
2 Look into the viewfinder.
The subject inside comes into focus.
3 When using a zoom lens, turn
the zoom ring, then decide on
your shot.