12
GB
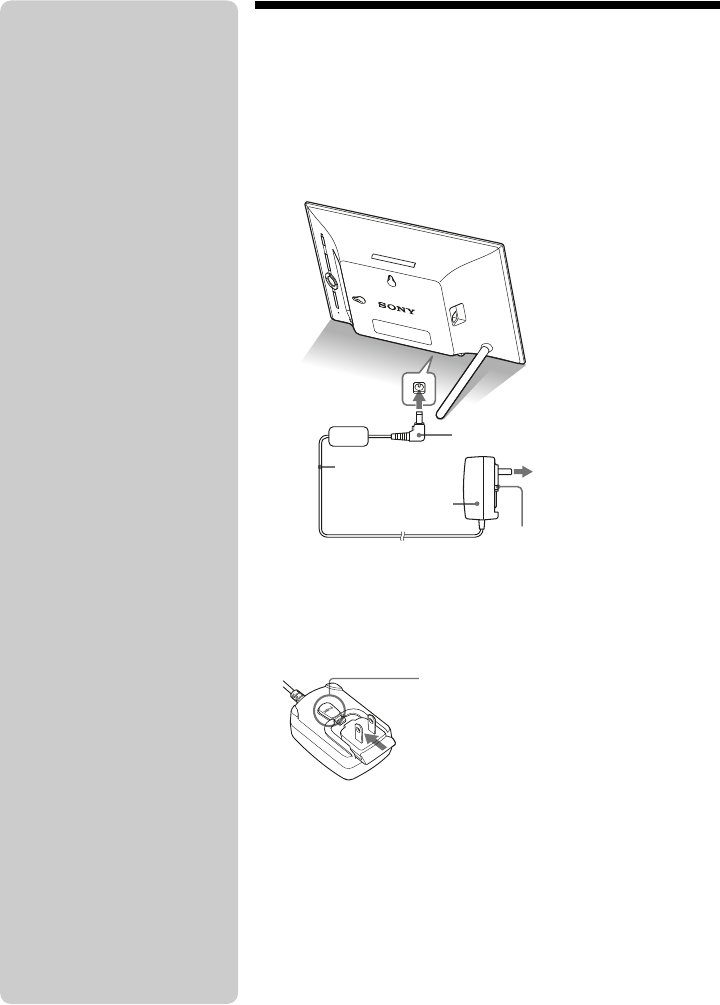
Turning the photo frame on
1 Insert the plug of the AC adaptor into the DC IN 5V
jack on the rear of the photo frame.
2 Connect the AC adaptor to the wall outlet.
The photo frame is automatically turned on.
When the AC plug is removed
Attaching the AC plug
Attach the AC plug to the AC adaptor main unit as follows:
To wall outlet
To the DC IN 5V
jack
AC adaptor main
unit
DC cable
DC plug
AC plug
PUSH tab clicks when the
AC plug is slid firmly into
place.
PNotes
• The socket outlet should be as close
as possible to the unit, and easily
accessible.
• Do not place the photo frame on an
unsteady or tilted surface.
• Connect the AC adaptor to an easily
accessible wall outlet close by. If
trouble occurs while using the
adaptor, immediately shut off the
power by disconnecting the plug
from the wall outlet.
• Do not short the plug of the AC
adaptor with a metal object. Doing
so may cause a malfunction.
• Do not use the AC adaptor placed in
a narrow space, such as between a
wall and furniture.
• Insert the plug of the AC adaptor
firmly, if the connection is loose,
the photo frame may turn off when
it is moved.
• After use, remove the AC adaptor
from the DC IN 5V jack of the
photo frame, and remove the AC
adaptor from the outlet.
• Do not turn the photo frame off or
disconnect the AC adaptor from the
photo frame before the standby
indicator turns red. Doing so may
damage the photo frame.
• The AC plug may be removed from
the AC adaptor main unit by
pushing the “PUSH” tab. When
using the AC adaptor, however, you
do not have to remove the AC plug.
Make sure to use the AC adaptor
with the AC plug firmly attached. If
the AC plug is removed, slide it into
the AC adaptor main unit until it
clicks into place as illustrated.
• The AC plug shape may differ
depending on the region you
purchase the photo frame.


