


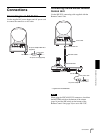
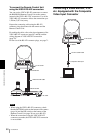
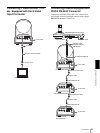


Installation and Connections
Installation
47
3
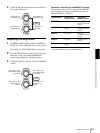
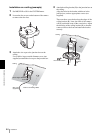
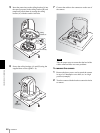
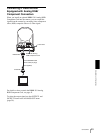
Attach the ceiling bracket (B) to a shelf, etc. on
which the camera is to be installed.
Use four screws (not supplied) appropriate for the
materials of the shelf, etc. There are three screw
holes along the edges of the ceiling bracket (B).
Later, the front of the camera will be positioned at
one of the screw holes. Adjust the direction of the
ceiling bracket (B) so that the camera will face the
front and attach the bracket securely.
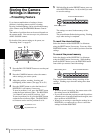
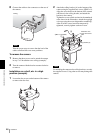
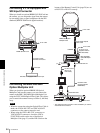
4
Attach the other end of the wire rope to the material
near the shelf, etc.
Use an M4 or larger outside diameter screw (not
supplied). Attach the wire rope to the material
independent of the shelf, etc. where the ceiling
bracket (B) is attached.
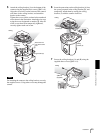
Hole for
connecting
cables
About 70 mm (2
7
/8 in.)
diameter hole for
protrusions of the ceiling
bracket
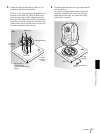
Wall
Screws (4)
Ceiling bracket (B)
Screw hole
(front of the
camera)
Shelf, etc.
P
O
W
E
R
STANDBY
I
R
Wire rope
(supplied)
M4 or larger diameter
screw
Shelf, etc.