


29
Saving movies and photos with a computer
GB
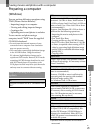
Importing movies and
photos to a computer
(Easy PC Back-up)
Movies and photos recorded on your
camcorder that have not yet been saved
with Easy PC Back-up can be imported
to a computer automatically. Turn on the
computer beforehand.
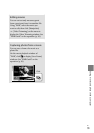
Connect your camcorder to the wall outlet (wall
socket) using the supplied AC Adaptor for this
o
peration (p. 10).
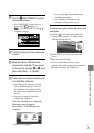
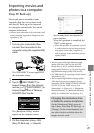
1
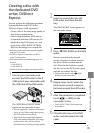
Turn on your camcorder, then
connect the camcorder to the
computer using the supplied USB
cable.
The [USB SELECT] screen appears on
the camcorder screen.
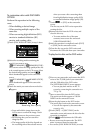
2
Touch [ USB CONNECT] to
import images from the internal
memory, or [ USB CONNECT] to
import images from a “Memory
Stick PRO Duo” media.
The [Handycam Utility] window
appears on the computer screen.
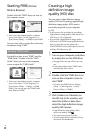
3
On the computer screen, click
[Easy PC Back-up] [Import].
Movies and photos are imported to
your computer.
When the operation is completed, the
“PMB” screen appears.
When the operation is completed, a screen
to indicate that movies are being analyzed
may appear. It may take a long time to
analyze movies. In the meantime, you can
operate “PMB.”
You can create either high definition image
quality (HD) discs (Blu-ray disc/AVCHD
f
ormat disc) (p. 30) or standard definition
image quality (SD) di
scs (p. 32) from imported
high definition image quality (HD) movies.
See “PMB Guide” on importing selected movies
a
nd photos (p. 30).
You can export high definition image quality
(HD) movies from your computer to your
camcorder (HDR-CX500E/CX500VE/CX520E/
CX520VE). On the “PMB” screen, click
[Manipulate] [Export to] [Handycam
(Internal Memory)] or [Handycam (Memory
Stick)]. See “PMB Guide” f
or details (p. 30).
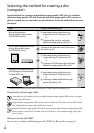
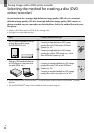
Changing the destination drive
or folder for movies and photos
On the [Handycam Utility] screen in
step 3 above, click [Easy PC Back-up]
[Change]. On the screen displayed, you
can select the drive or folder where the
images are to be saved.