


63
Dubbing/Editing
DCR-HC32E/HC33E/HC39E/HC42E/HC43E 2-584-907-11(1)
• To set the end point for audio dubbing,
beforehand, press ZERO SET MEMORY
on the Remote Commander at the scene at
which you want to stop audio dubbing during
playback. After step 2 to 4, the recording stops
automatically at the selected scene.
• You can only record additional audio over a
tape recorded on your camcorder. The sound
may deteriorate when you dub audio on a tape
recorded on other camcorders (including other
DCR-HC32E/HC33E/HC39E/HC42E/HC43E
camcorders).
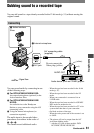
To check the recorded sound
Play back the tape on which you have
recorded audio (p. 21).
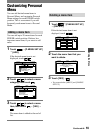
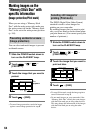
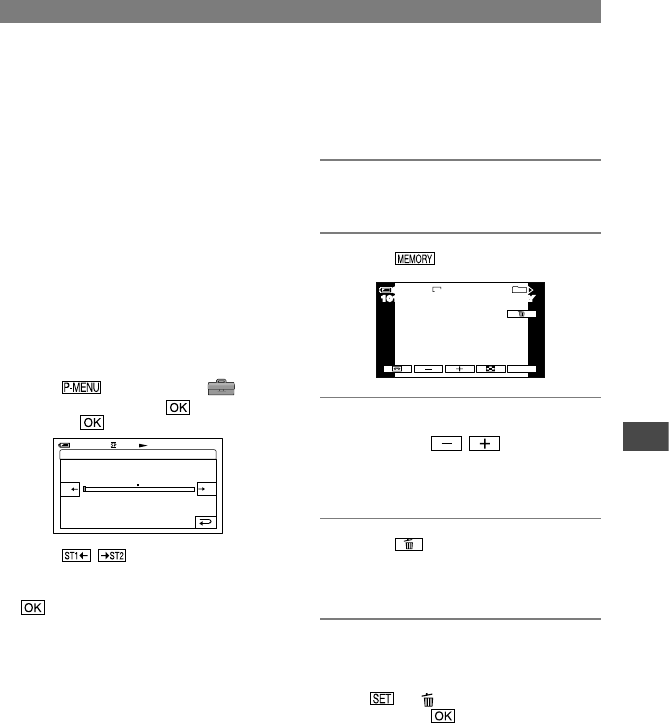
Touch [MENU]
(STANDARD SET) [AUDIO
MIX] .
AUDIO MIX
0:00:00:0060min
ST2
ST1
Touch
/
to adjust the balance
of the original sound (ST1) and the sound
recorded afterwards (ST2), then touch
.
• The original sound (ST1) is output at the default
setting.
• The adjusted audio balance returns to the
default setting in about 5 minutes after the
battery pack or other power sources have been
disconnected.
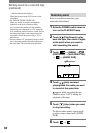
Deleting recorded pictures
from the “Memory Stick
Duo”
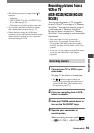
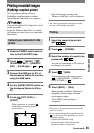
1 Slide the POWER switch down to
turn on the PLAY/EDIT lamp.
2 Touch .
101
2/10
101–0001
60min
P-MENU
MEMORY PLAYMEMORY PLAY
1152
60min
101–0001
3 Select a picture you want to
delete with / .
• To delete all pictures at once, select [ALL
ERASE] (p. 45).
4 Touch
[YES].
• The pictures cannot be restored once they
are deleted.
• You can delete pictures on the index screen (p.
21). You can easily search for the picture to be
deleted by displaying 6 pictures at once.
Touch [ DELETE] the picture you
want to delete [YES].
• Pictures cannot be deleted when a “Memory
Stick Duo” with the write-protect tab is set to
the write-protect position (p. 104), or when the
selected picture is protected (p. 64).