15
GB
Setting Up
Setting Up
Insert the print cartridge into the printer.
Use only the print cartridge supplied with the print
paper packed in the same carton.
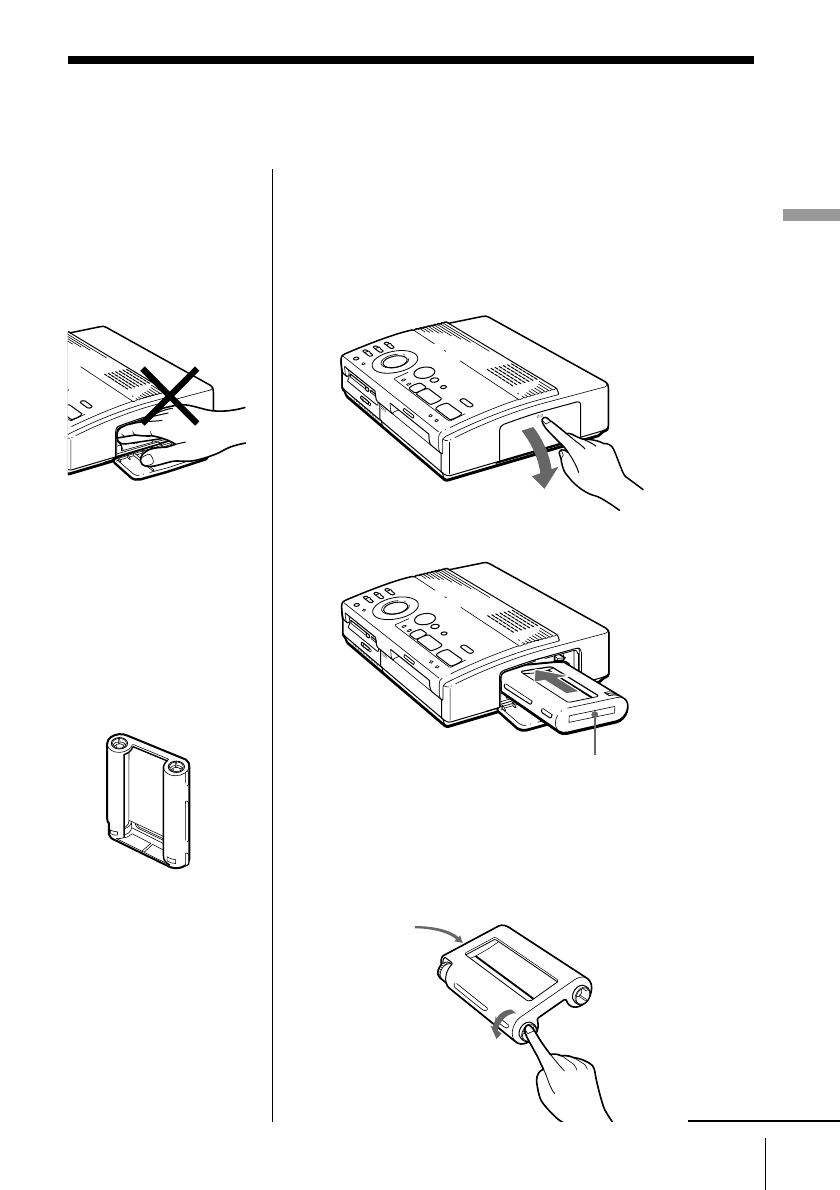
1 Press PUSH to open the cartridge compartment lid.
2 Insert the print cartridge firmly until it clicks into
place and close the cartridge compartment lid.
If the print cartridge does not click into place
Remove the print cartridge, and then re-insert it.
Only when the ink ribbon is too slack to be loaded,
wind the ink ribbon to remove the slack.
Labeled side
Loading the print cartridge
Caution
Never put your hand into
the cartridge
compartment. The
thermal head reaches
high temperatures,
especially after repeated
printing.
Notes
• If the print cartridge is
not loaded when you
turn on the printer, the
warning sound beeps
and the cartridge error
indicator lights up.
• When installing the
print cartridge, stand it
on end as illustrated so
that dust will not get on
the ink ribbon.
• Do not touch the ink
ribbon or place the
print cartridge in a
dusty location.
Fingerprints or dust on
the ink ribbon may
result in imperfect
printing.
continued
While pressing the
center of the reel,
wind the ink
ribbon in the
direction of the
arrow.
Labeled side


