


67
Dubbing/Editing
DCR-HC32/HC42 2-584-906-11(1)
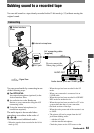
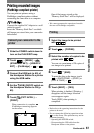
Printing recorded images
(PictBridge compliant printer)
You can print out pictures using a
PictBridge compliant printer without
connecting the camcorder to a computer.
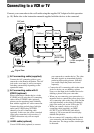
Connect the supplied AC Adaptor to a wall
outlet for power.
Insert the “Memory Stick Duo” on which
still images are stored into your camcorder
beforehand.
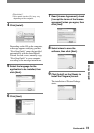
Connect your camcorder to the
printer
1 Slide the POWER switch down to
turn on the PLAY/EDIT lamp.
2 Touch
[MENU]
(STANDARD SET)
[USB-PLY/
EDT]
[PictBridge]
.
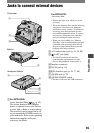
3 Connect the USB jack (p. 69) of
the Handycam Station to a printer
using the USB cable.
4 Set the (USB) ON/OFF switch on
the Handycam Station to ON (p.
69)
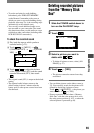
5 Touch (PICT. APPLI.)
[PRINT].
When connection is complete,
(PictBridge connecting) appears
on the screen.
P
R
I
N
T
1
0
1
-
0
0
0
1
SET
+
-
101
1/10
END
1152
EXEC
PRINT
101-0001
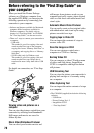
One of the images stored on the
“Memory Stick Duo” will be displayed.
• We cannot guarantee the operation of models
that are not PictBridge compatible.
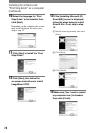
Printing
1 Select the image to be printed
with / .
2 Touch
[COPIES].
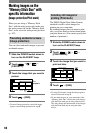
3 Select the number of copies to be
printed with / .
You can set a maximum of 20 copies of
one image to be printed.
4 Touch
[END].
To print the date on the image, touch
[DATE/TIME] [DATE] or
[DAY & TIME] .
5 Touch [EXEC]
[YES].
When printing is finished, [Printing...]
disappears and the image selection
screen appears again.
Touch [END] when printing is
completed.
• Refer also to the operating instructions for the
printer to be used.
• Do not attempt the following operations when
is on the screen. The operations may not be
performed properly.
– Operating the POWER switch.
– Disconnecting the USB cable from the
Handycam Station or the printer.
Continued