


24
Saving images
Due to the limited capacity of the “Memory
Stick PRO Duo,” make sure that you save
the image data to some type of external
media such as a DVD-R or a computer.
You can save the images recorded on the
camcorder as described below.
Using a computer
By using “PMB” on the supplied CD-ROM,
you can save the images recorded on your
camcorder with HD (high denition)
image quality or SD (standard denition)
image quality. For details, see “PMB Guide”
(p. 28).
Creating a disc with One Touch (One Touch
Disc Burn)
You can save images recorded on your
camcorder directly to a disc with ease by
pressing the (DISC BURN) button.
Saving images on a computer (Easy PC
Back-up)
You can save images recorded on the
camcorder on the hard disk of a computer.
Creating a disc with selected images
You can save images copied to your
computer on a disc. You can also edit those
images.
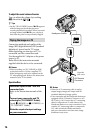
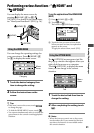
Connecting your camcorder to other
devices
Power your camcorder from a wall outlet
(wall socket) using the supplied AC
adaptor.
Refer also to the instruction manual of the
recording device.
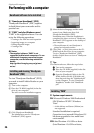
Creating a disc of HD (high denition) image
quality
Connect your camcorder to a Sony Blu-ray
Disc recorder or DVD writer, etc., via USB
connection to dub HD (high denition)
quality images with no image degradation.
Turn on your camcorder.
Connect the (USB) jack of your Handycam
Station and the other device (DVD writer,
etc.) with the supplied USB cable.
e [USB SELECT] screen appears
automatically.
Touch [ USB CONNECT].
Start recording on the connected device.
Aer dubbing is complete, touch [END]
[YES], then disconnect the USB cable.
Creating a disc of SD (standard denition)
image quality
Connect your camcorder to a DVD/HDD
recorder, etc., to dub movies to a disc.
Turn on your camcorder.
Touch (VIEW IMAGES) button.
Prepare the recording device.
Turn on the device, and insert a disc for
recording when you use a DVD recorder as a
recording device. If your recording device has
an input selector, set it to the input mode.
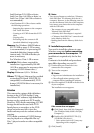
Connect your camcorder to the recording
device (VCR, DVD/HDD recorder) with an
A/V connecting cable (supplied) or an A/V
connecting cable with S VIDEO (optional).
Connect your camcorder to the input jacks of
the recording device.
Start playback on your camcorder, and record
it on the recording device.
Aer dubbing is complete, stop the recording
device, and then your camcorder.