


3
14
Troubleshooting Wireless Camera Images
Poor Picture:
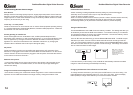
Realign antennas until image quality improves, slightly adjust the position of the Camera or
Receiver. Change the location of the Camera, or use a different height or angle to see if the
image improves. In some cases interference may be caused by another device on a similar
frequency to the channel you are using.
Lines only - no clear picture:
Check to confirm there is no microwave oven or other 2.4GHz equipment operating close by
ie; Cordless Telephones, Wireless Baby Monitors, Wireless LAN equipment etc . Make sure
the Receiver is on the correct channel.
Picture ghosting or interference:
Some home appliances such as Wireless LANs, 2.4GHz portable telephones and
Microwave ovens operate on or near the 2.4GHz frequency. If you receive interference from
such an appliance, try moving the Camera or Receiver to location further away from the
appliance or in the event of interference from a Wireless LAN device, try changing the
Wireless LAN to a different channel to improve the signal quality.
No picture:
Check the receiver to confirm it is turned ON and make sure the A/V connection of the
Receiver is not plugged into the Audio Out socket. Make sure the Receiver is on the correct
channel. Check to ensure the camera is plugged in and has power. Check that the channel
on the receiver is the set to Channel x.
Red haze over picture:
In some cases where the sun shines into the front of the camera a faint red glow can be
seen. Move the camera to a shaded location, or fit a hood to stop sunlight entering the
camera lens directly.
Foreground is dark while background is too bright:
If the camera is looking from a dark area towards a light area in some cases the automatic
exposure can find it difficult to balance the image correctly. Change the location of the
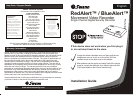
RedAlert/BlueAlert Features
-Motion recording including adjustable sensitivity settings to prevent false triggers
-Manually record 10 second video clips or snap individual photos
-Option for wired or wireless camera
-Built-in 4 channel wireless camera receiver (records 1 wired or wireless camera at a time)
-Video and pictures can be recorded to SD cards for easy transfer to a computer
-Small design allows you to place DVR in discreet location to prevent tampering
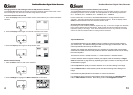
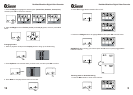
Changing the Wireless Camera Channel on Your DVR
To change wireless channels on your DVR, push the SET button on the front casing. The
light indicates the current wireless channel i.e. CH1, CH2, CH3, CH4. Push the display
button (DISP) to change views between your wired and wireless cameras.
If onboard memory or SD memory is full, the DVR will automatically overwrite the oldest
images or video first ensuring the DVR keeps recording.
RedAlert/BlueAlert Digital Video Recorder RedAlert/BlueAlert Digital Video Recorder
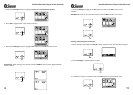
Using the SD Card Slot
Insert an SD card with label facing up into the RedAlert/BlueAlert DVR. The DVR accepts
SD cards up to 2GB. Once the card is inserted the DVR will save recordings to the SD
card. You can playback images on a monitor directly from the RedAlert/BlueAlert or insert
the card into a card reader on your computer to view recordings. Recordings are saved as
AVI for videos and JPEG for still images.
The RedAlert/BlueAlert has 16MB of onboard memory installed. This storage will allow you
to familiarize yourself with the DVR and its features. The onboard memory is not intended
as a permanent solution for storing your images and videos. The onboard memory cannot
be transferred or backed up onto an SD card.
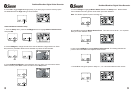
Note: When an SD card is
inserted, an icon appears
showing it is detected by the
RedAlert/BlueAlert. All
images will now be recorded
to the SD card.
SDSD
SDSD