


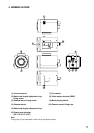


7
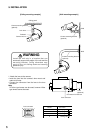
2. Mount the optional camera mounting bracket to a ceiling or wall.
Using an electrical box, fix the camera mounting bracket with its supplied screws. Run the coaxial cable
through the hole in the bracket.
3. Set the camera mounting bracket securely in the threaded hole in the camera mount rotating the bracket’s
pedestal.
Notes
• The camera mount can be mounted to both the top and bottom of the camera. Attach the bracket to either
side depending on installation conditions.
• Use the camera mount fixing screw to attach or detach the camera mount.
4. Set the camera orientation, and secure the camera.
After setting the camera orientation, rotate the lock lever to secure the camera.
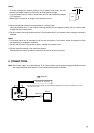
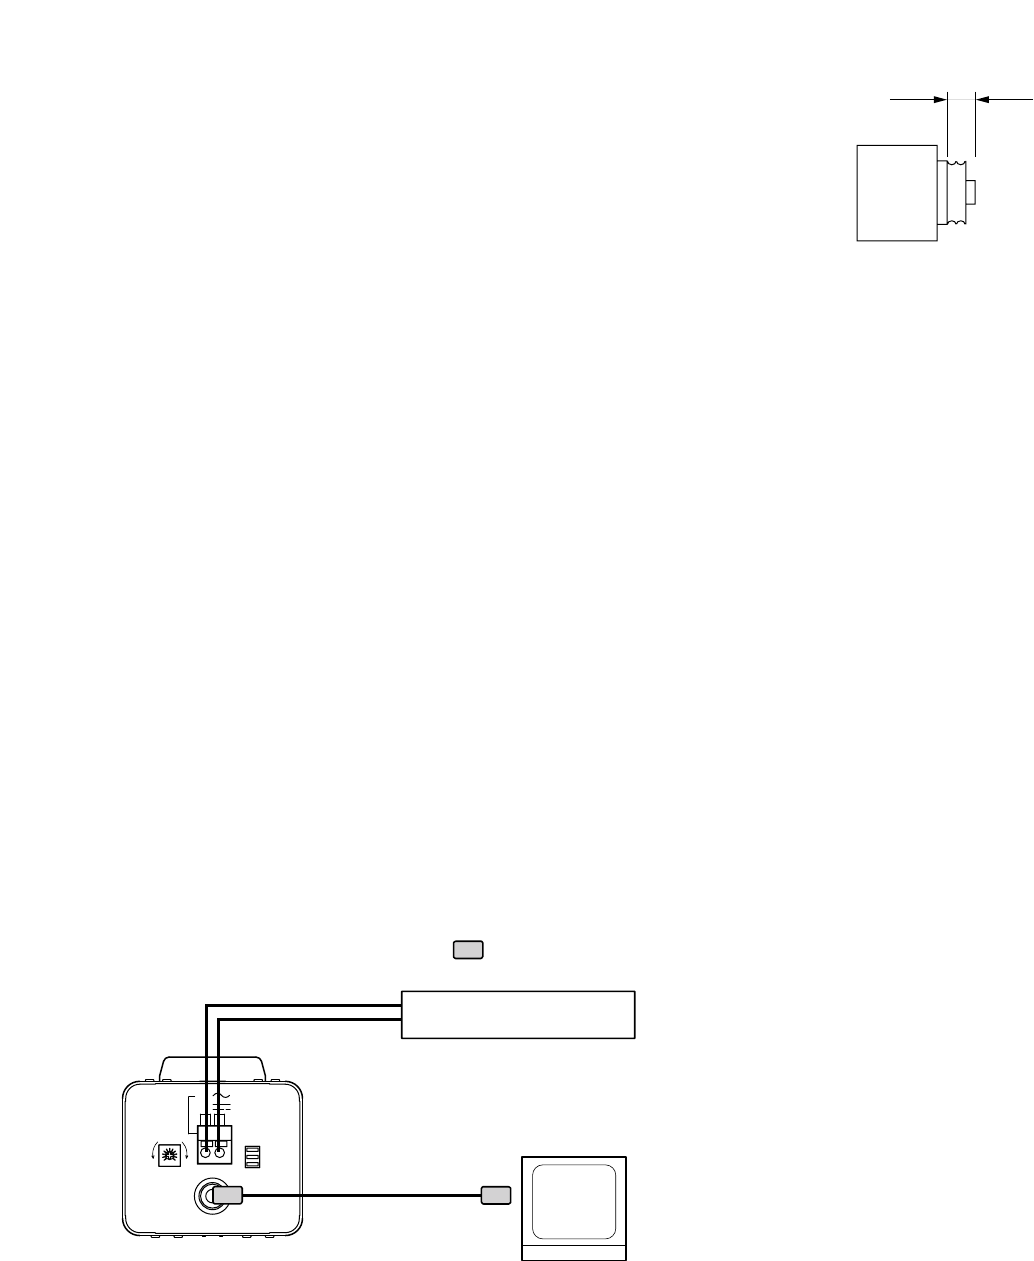
12V
24V
+
-
IRIS
L
H
OFF ON
VIDEO OUT
FOUCUS ADJ
BLC
SHUTTER
Video output
: BNC plug
24 V AC or 12 V DC
Use the external power supply unit of the following rating when the camera is operated on 12 V DC.
12 V DC, over 1.0 A
Monitor
Video input
6. CONNECTIONS
Note: If the Video output is not terminated at 75 Ω, video pictures are not properly displayed. Make sure that
the output has been terminated at 75 Ω at the connected monitor or switcher.
Notes
• To avoid damaging the internal sections of the camera's lens mount, be sure
that the lens flange is less than 5 mm thick as illustrated on the right.
• C-mount lenses must be used in conjunction with the Lens Mounting Adapter
CF-5 (optional).
• When used 1/3 type lens, an angle of view becomes narrow.
Lens
Under 5 mm