


10
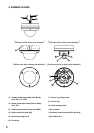
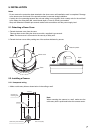
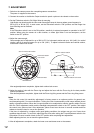
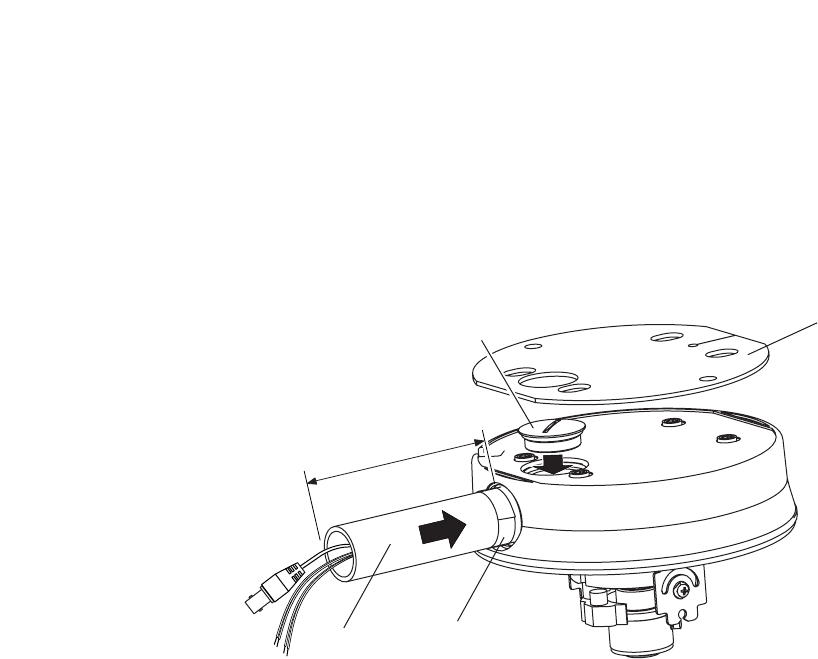
Sealing tape
Pipe
Base gasket
Approx.100 mm
(
3.9 inch
)
Pipe receptacle
thread cover
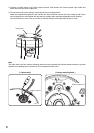
3. Attach the removed pipe receptacle thread cover to the threaded section at the upper surface of the camera
unit.
4. Wrap two or more layers of sealing tape around the pipe’s threaded section, then screw the pipe into the
camera’s threaded receptacle.
Sealing tape must be wrapped around the pipe’s threaded part. The pipe to be used must be approximately
100 mm
(
3.9 inch
)
in length.
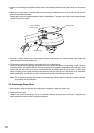
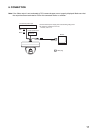
5. Connect a coaxial cable to the Video output terminal, and connect the Camera power input cable and
power wire from the power-supply unit.
6. Fix the camera unit to the ceiling or wall using the four mounting screws.
Attach the supplied base gasket to the camera unit, then install the camera to the ceiling or wall. Since no
mounting screws are supplied with the camera, prepare them separately depending on the situation. (Use
screws that are over 4 mm
(
0.16 inch
)
in nominal diameter and longer than 25 mm
(
1 inch
)
.) Further, when
using a coupling, join the pipe mounted to the camera to the pipe coming out of the device to be connected.
When installing the camera unit to a wall, install the camera unit so that its pipe faces down.
Note: The 4 camera mounting holes must be protected with silicone sealant material to protect rainwater
from leaking into the enclosure.
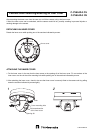
5.3. Attaching a Dome Cover
1. After camera’s angle of view and focus adjustment completion, attach the inner cover.
2. Attach the dome cover.
Check to be sure that the safety wire is not pinched between the dome cover and case. Dustproof and
water-resistance features could be adversely affected.