8
Searching for data using Date and Time
You can also use the search function of the DVR to look back though stored data via date and time
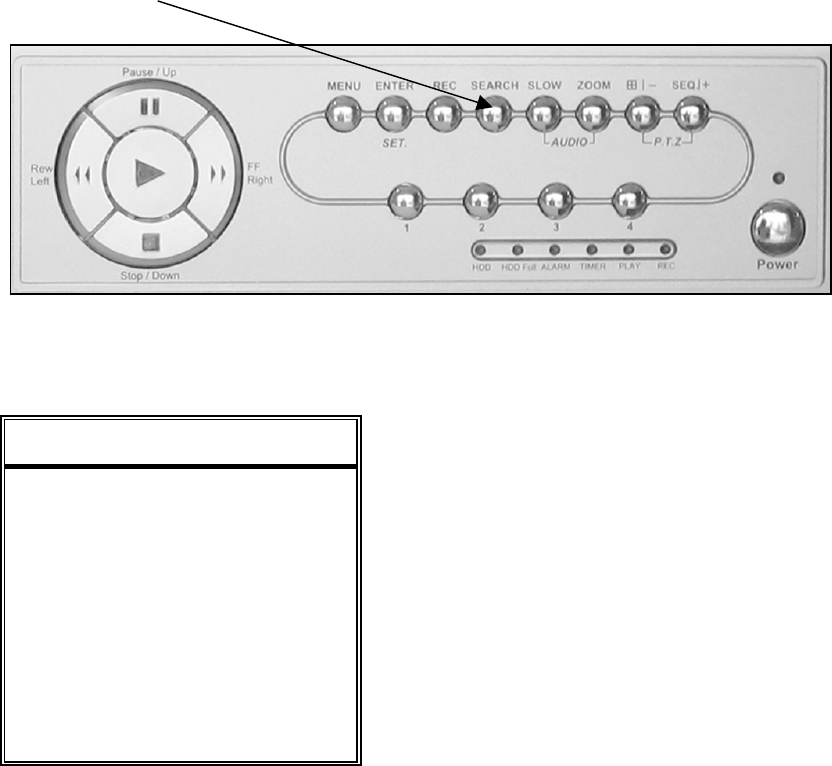
• Press “SEARCH” button on the front panel of the DVR to enter the search mode.
• Then the screen will show the following options.
• Select “TIME SEARCH” from the menu,
• Enter the Date and Time (DAY / MONTH / YEAR / HOUR / MIN / SEC) of the event you wish to
view using the following buttons:
“▲▼◄► “ to move the cursor.
“+”, “-” to choose the numbers / selections.
“ ENTER “ to go to the submenu / to confirm the selection
“ MENU “ to go to the menu OSD / to confirm the change / to exit the menu OSD
• Once you have entered the Date and Time move the cursor to the SELECT button and press
“ENTER”
• The DVR will then start playing back recorded data from the selected period, use the FAST
FORWARD / REWIND / PAUSE / SLOW PLAYBACK and CHANNEL SHIFT buttons on the unit
to navigate through the footage as required
• To finish viewing the playback, press the stop “ ■ ” button to return to the live display
S
S
E
E
A
A
R
R
C
C
H
H
HDD-MASTER-1
FULL LIST
RECORD LIST
SYSTEM LIST
ALARM LIST
MOTION LIST
EVENT SEARCH
TIME SEARCH


