19
En
Part names and functions
4 Turn the rotary selector.
The character displayed in the top left switches.
Select the character to which you want to move.
5 Press the rotary selector.
The display switches to the item selected in step 4.
Searching by inputting a character string
This function lets you display only the artists, albums, tracks or files
containing the character string you input.
! Categories not selected in the [Preferences] in rekordbox (Mac/
Windows) are not displayed.
1 Press the [ USB] button.
Switch to the [BROWSE] display.
2 Turn the rotary selector.
Select [SEARCH].
3 Press the rotary selector.
The display switches to the character input screen.
4 Using the rotary selector to input characters.
Turn the rotary selector and select the desired character, then press the
rotary selector to enter that character.
! Repeat this operation to input other characters.
5 Once you have completed inputting the character
string, press the rotary selector.
Only items containing the character string you have input are displayed.
Switching the information display mode
The bottom section of the display switches between the track name and
beat display each time the [INFO(UTILITY)] button is pressed.
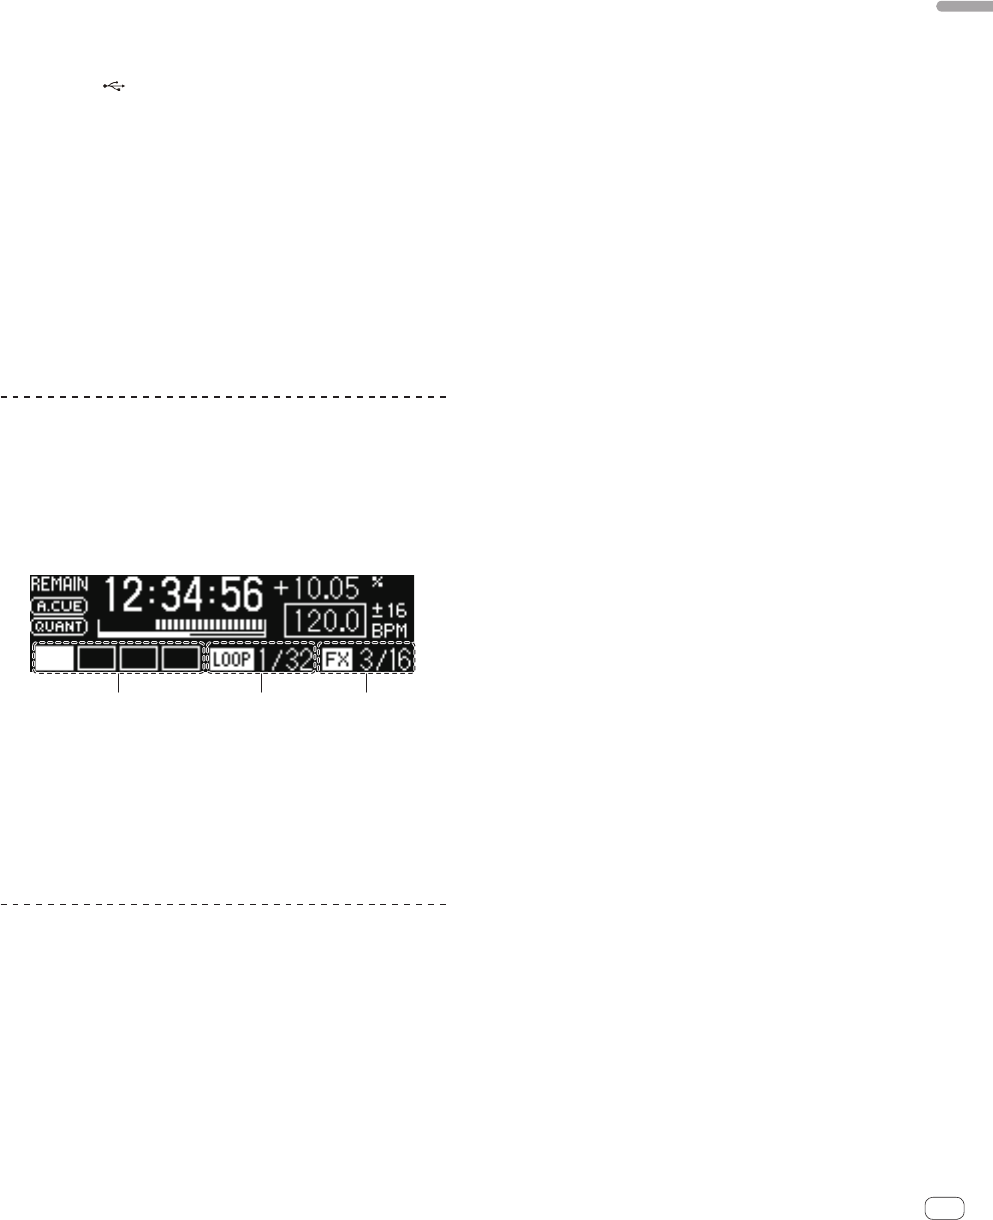
Using the beat display function
This displays the beat and playback position of the currently playing
track.
1 2 3
1 Beat display section
2 Auto loop display section
3 Effect display section
! When display of track name is selected in the information display
mode, the mode automatically switches to the beat display when one
of the operations below is performed.
— Scratch
— Auto beat loop setting
— Effect setting
Setting auto cue
When a track is loaded or the track search operation is performed, the
silent section at the beginning of the track is skipped and the cue point
is automatically set at the point immediately before the sound starts.
Press the [TIME (AUTO CUE, QUANTIZE)] button for over
1 second.
Auto cue is set to on.
[A. CUE] lights on the main unit display.
! When the [TIME (AUTO CUE, QUANTIZE)] button is pressed again
for over 1 second, auto cue is set to off.
! The auto cue level setting remains in the memory, even when the
power is turned off.
Changing the auto cue level
The acoustic pressure level identified as a silent section with the auto
cue function can be selected from eight levels.
! The auto cue level setting remains in the memory, even when the
power is turned off.
1 Press the [INFO(UTILITY)] button for over 1 second.
The [UTILITY] screen is displayed.
2 Turn the rotary selector then press it.
Select [A. CUE LEVEL].
3 Turn the rotary selector then press it.
The auto cue level setting changes.
