18 © Titan Tool Inc. All rights reserved.
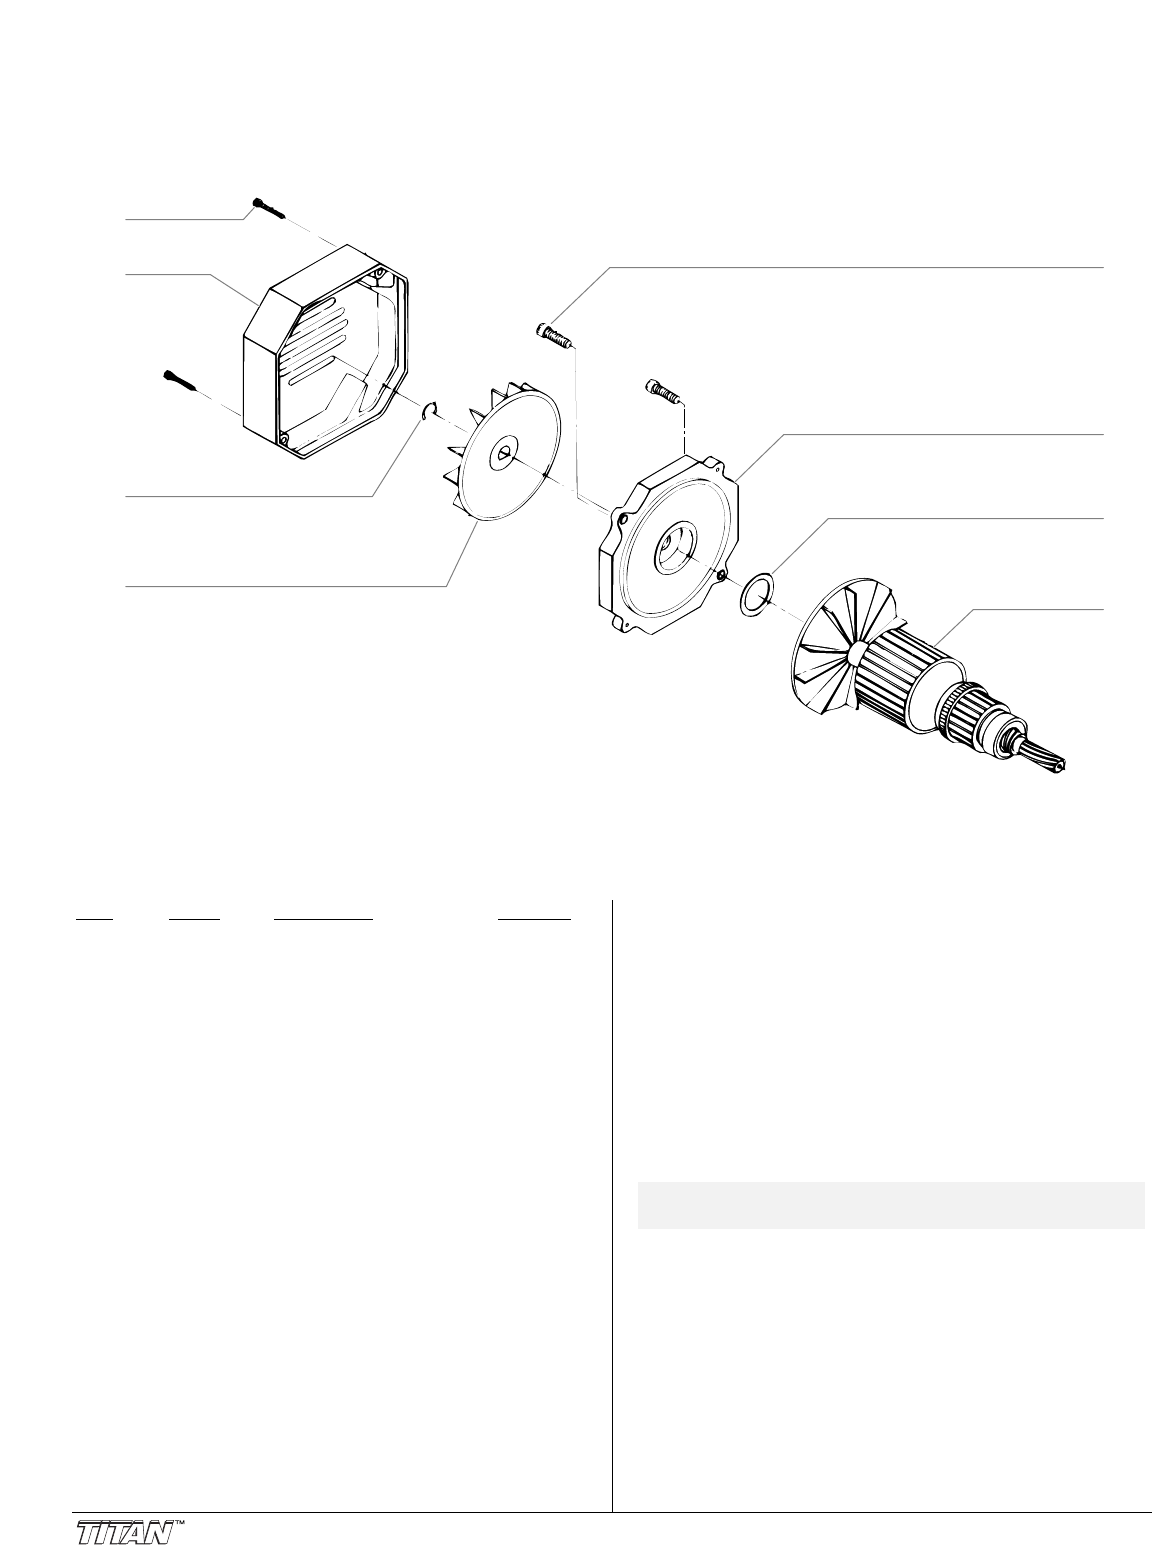
Item Part # Description Quantity
130 761-023 Screw ..................................................2
131 702-046 Rear Cover..........................................1
133 611-405 Snap Ring............................................1
135 702-040 Outer Fan ............................................1
136 702-045 Rear Motor Housing............................1
137 702-047 Wave Washer......................................1
138 700-681 Screw ..................................................2
139 702-242 Armature (110V units) .........................1
702-241 Armature (100V units) .........................1
702-243 Armature (230V units).........................1
Armature Replacement
WARNING: Before proceeding, follow the Pressure Relief
Procedure outlined on page 5. Additionally, follow all other
warnings to reduce the risk of an injection injury, injury
from moving parts or electric shock. Always unplug the
sprayer before servicing!
1. Remove Rear Cover (#131) by taking out screws (#130).
2. Remove Snap Ring (#133).
3. Remove Fan (#135).
4. Remove Snap Ring (#133).
5. Remove Rear Motor Housing (#136) by removing screws
(#132).
6. Remove Motor Brushes. Follow Brush replacement
procedure, located on page 21.
7. Remove Armature by gently rocking and pulling Fan from
rear of pump.
8. Inspect Armature. If damaged, replace.
9. To replace Armature, reverse steps 1 through 7 here.
NOTE: Make sure to remove Wave Washer (#137) which
should be on the End Bearing of the Armature.
Motor Assembly
Figure 5
