© Titan Tool Inc. All rights reserved. 15
230V Service Instructions
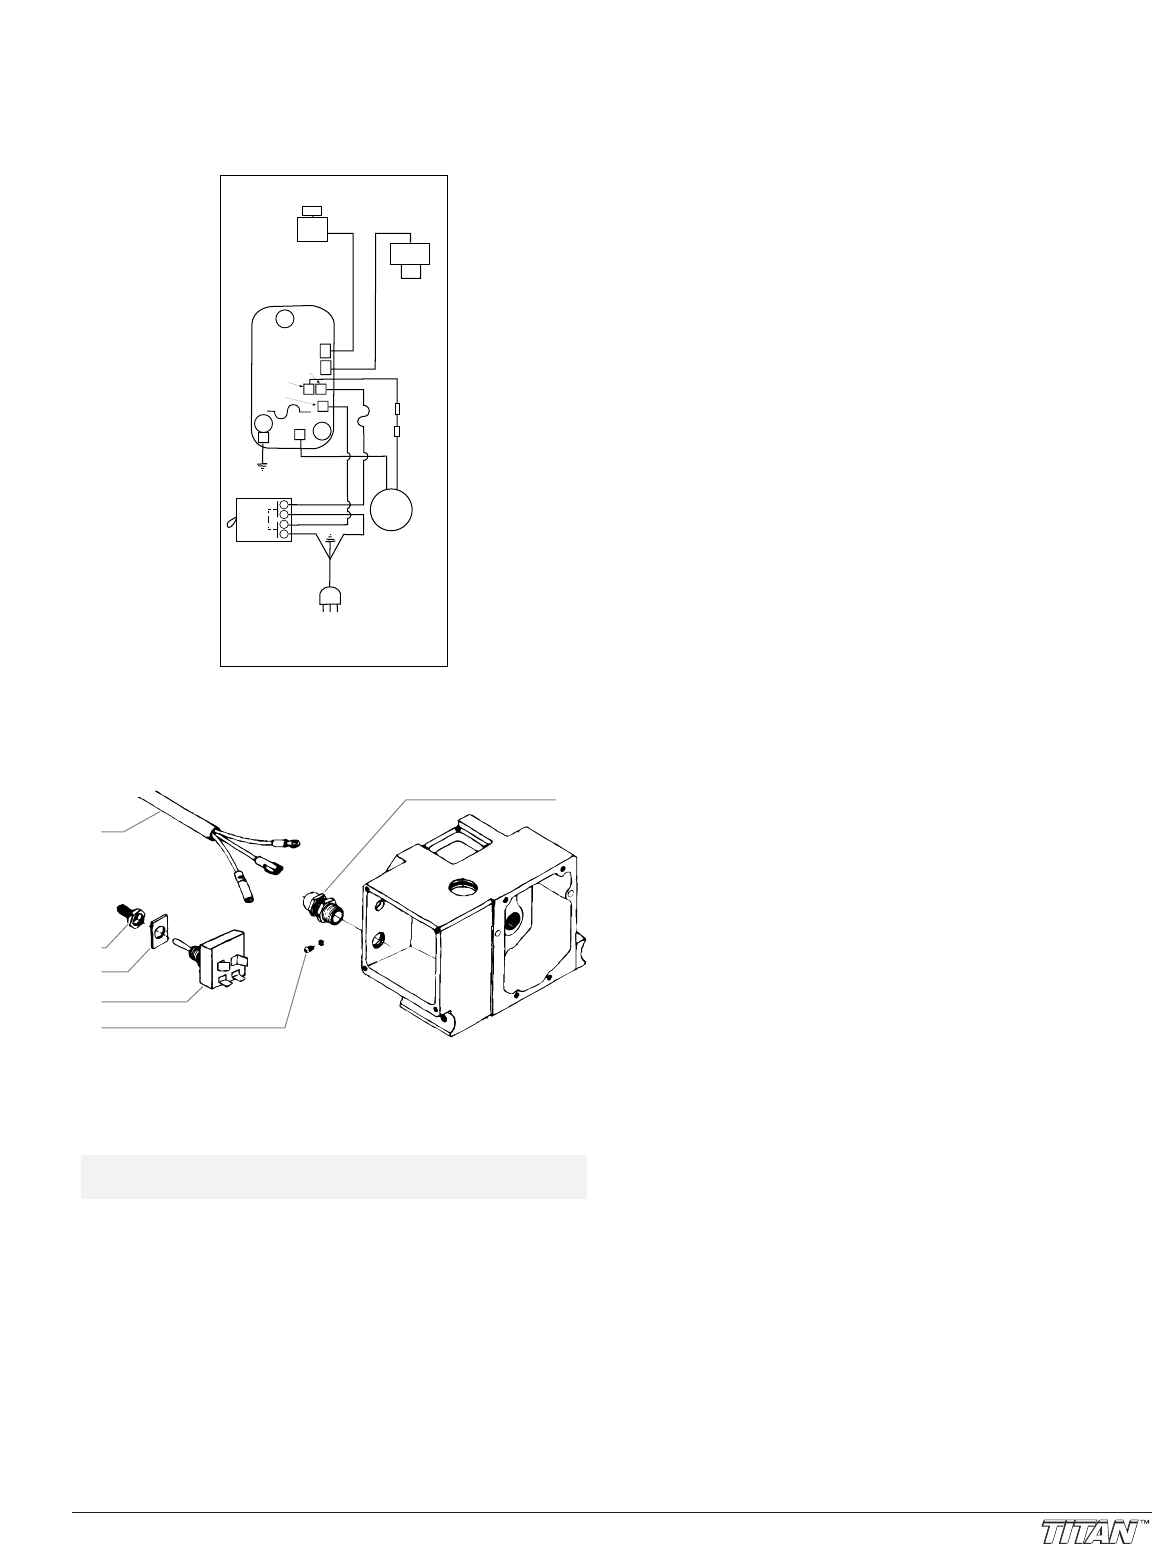
Electrical Schematic for 230 Volt Motors
Figure 3A
Figure 3B
NOTE: See page 20 for description of parts and part
numbers.
46
47
48
49
42
45
TRANSDUCER
700-197
POTENTIOMETER
700-158
PRESSURE
CONTROL
BOARD
700-173
SWITCH
MOTOR
PLUG
BLUE
BROWN
BLACK
WHITE
WHITE
CONNECTING
WIRE
J5
NEUT
J6
SWITCH
J7
MOTOR
J8
GND
J3
J2
J4
MOTOR
ELECTRICAL CONTROL ASSEMBLY
230V -- 550; E15; E20; 660; 1100
IN-LINE
FUSE
POLE 2
POLE 1
On/Off Switch Replacement
WARNING: Before proceeding, follow the Pressure Relief
Procedure outlined on Page 5. Additionally, follow all
other warnings to reduce the risk of an injection injury,
injury from moving parts or electric shock. Always unplug
the sprayer before servicing!
1. Remove Pressure Control Board and screws (55 & 56).
2. Disconnect the four wires from the ON/OFF Switch (#49).
3. Remove the rubber boot and plate (#47 & #48) with a
wrench.
4. Remove the ON/OFF Switch (#49).
5. Install a new Switch and reattach plate and rubber boot.
Tighten securely.
6. Reconnect the four wires to the new ON/OFF Switch.
7. Reinstall Pressure Control Board and screws, with warning
label facing out.
Power Supply Cord Replacement
WARNING: Before proceeding, follow the Pressure Relief
Procedure outlined on Page 5. Additionally, follow all other
warnings to reduce the risk of an injection injury, injury
from moving parts or electric shock. Always unplug the
sprayer before servicing!
1. Remove Pressure Control Board and screws (55 & 56).
2. Disconnect the Power Supply Cord (#46) from
a) the ON/OFF Switch (#49),
b) the white wire connected to the motor and,
c) the green wire connected to the grounding screw. Refer
to the Electrical Schematic.
3. Loosen the cord grip housing (#45) and remove the power
cord (#46).
4. Install the new cord in reverse order of disassembly.
5. Install the Pressure Control Board and screws with warning
label facing out.
